This procedure outlines the steps for integrating Constellix with Microsoft Azure to ensure seamless functionality and optimal performance within the cloud environment.
To integrate Constellix with Microsoft Azure, complete the following steps:
- Log in to Microsoft Azure.
- Obtain the following values for use in Step 5:
- Subscription ID:
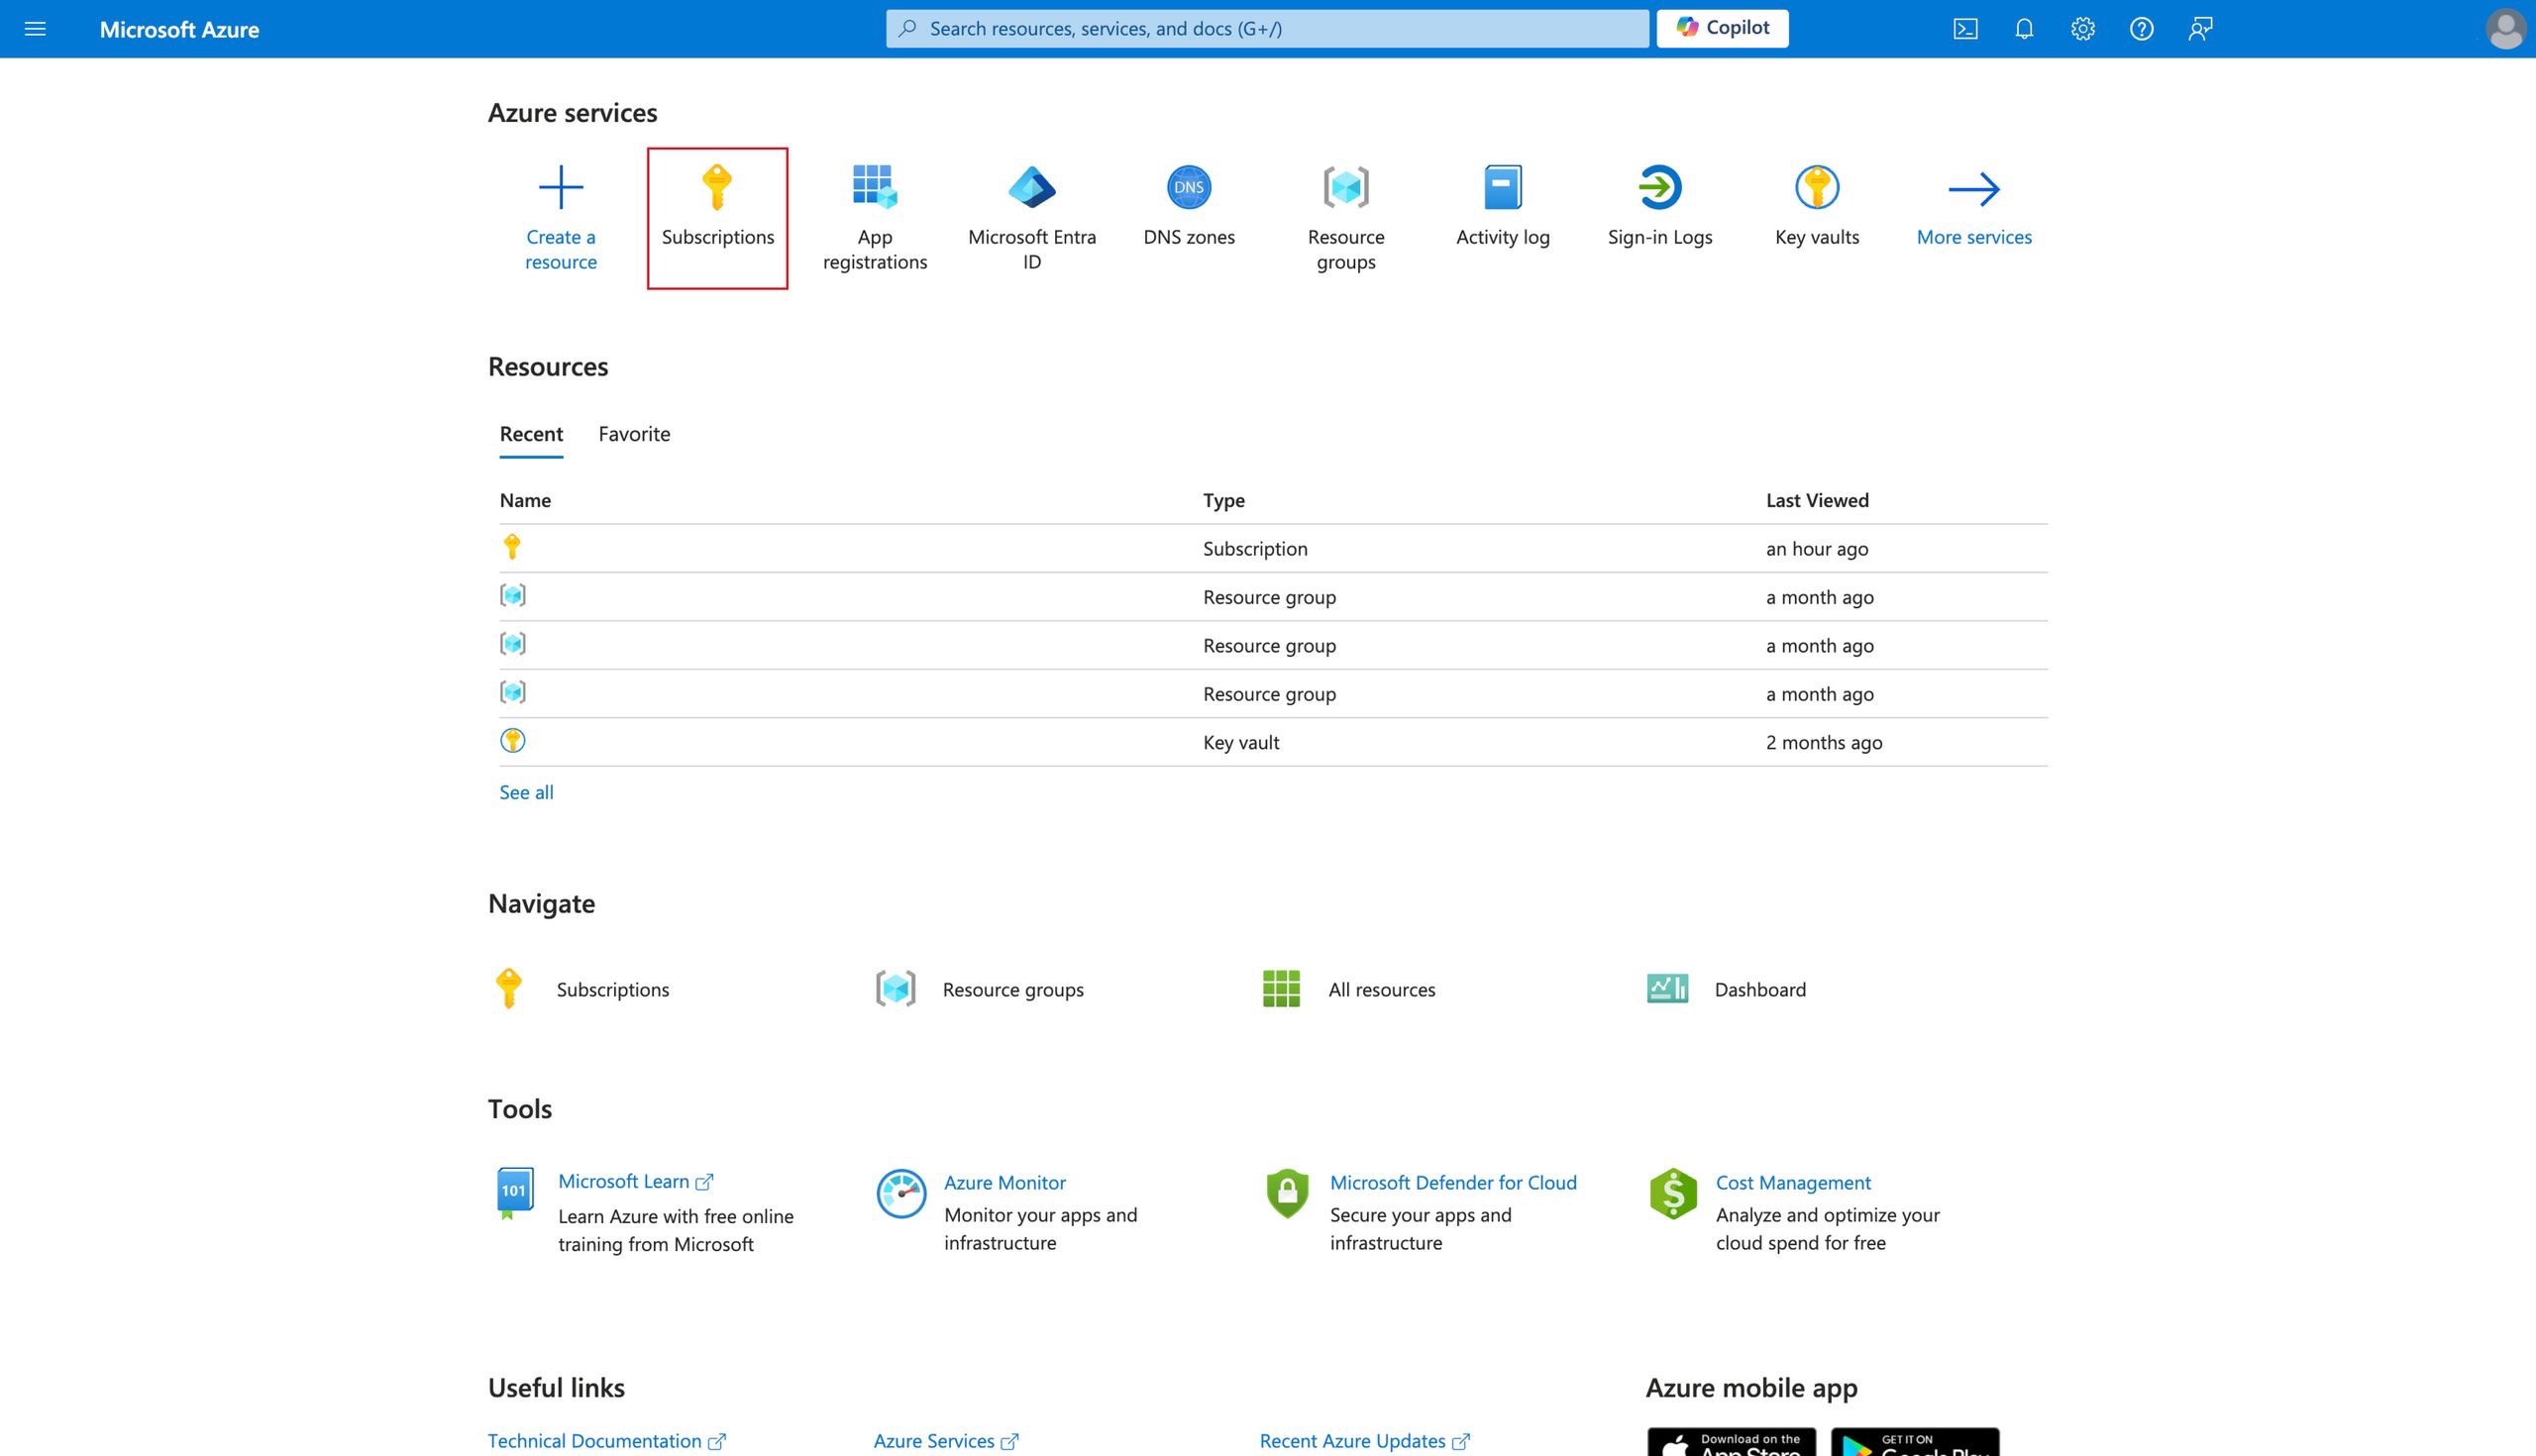
- Navigate to Subscriptions.
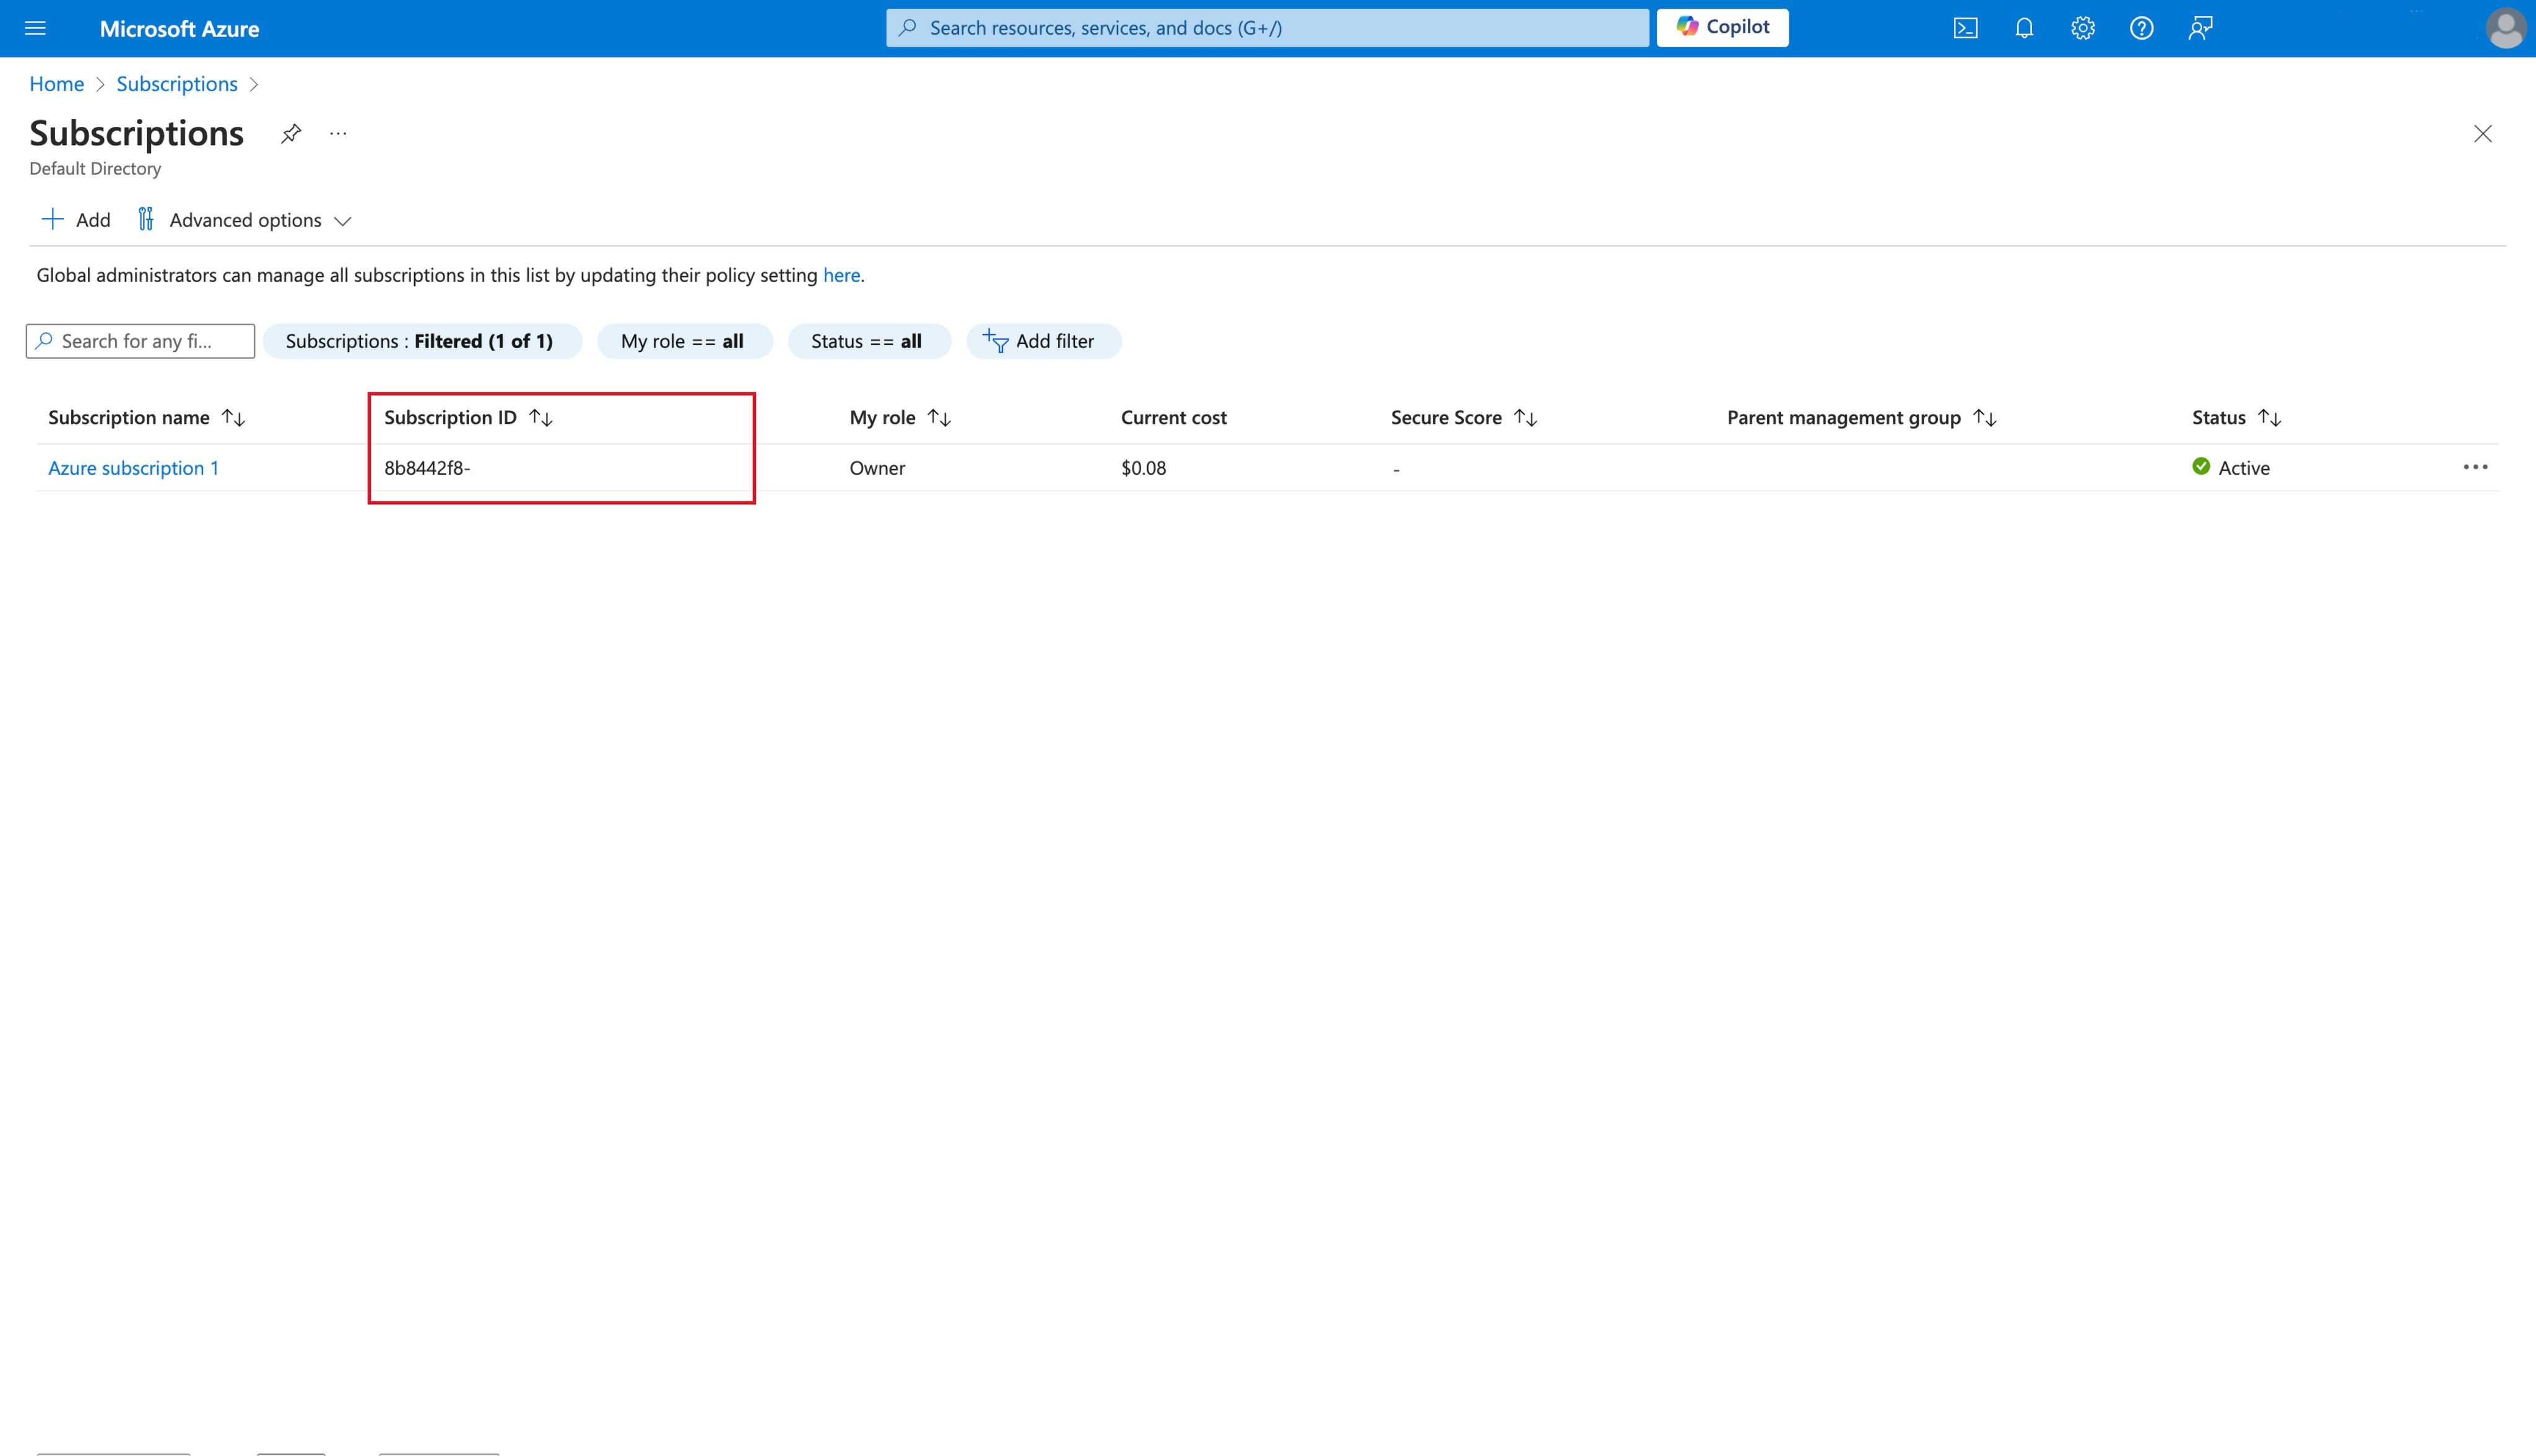
- Copy the unique Subscription ID string.
- Navigate to Subscriptions.
- Tenant ID:
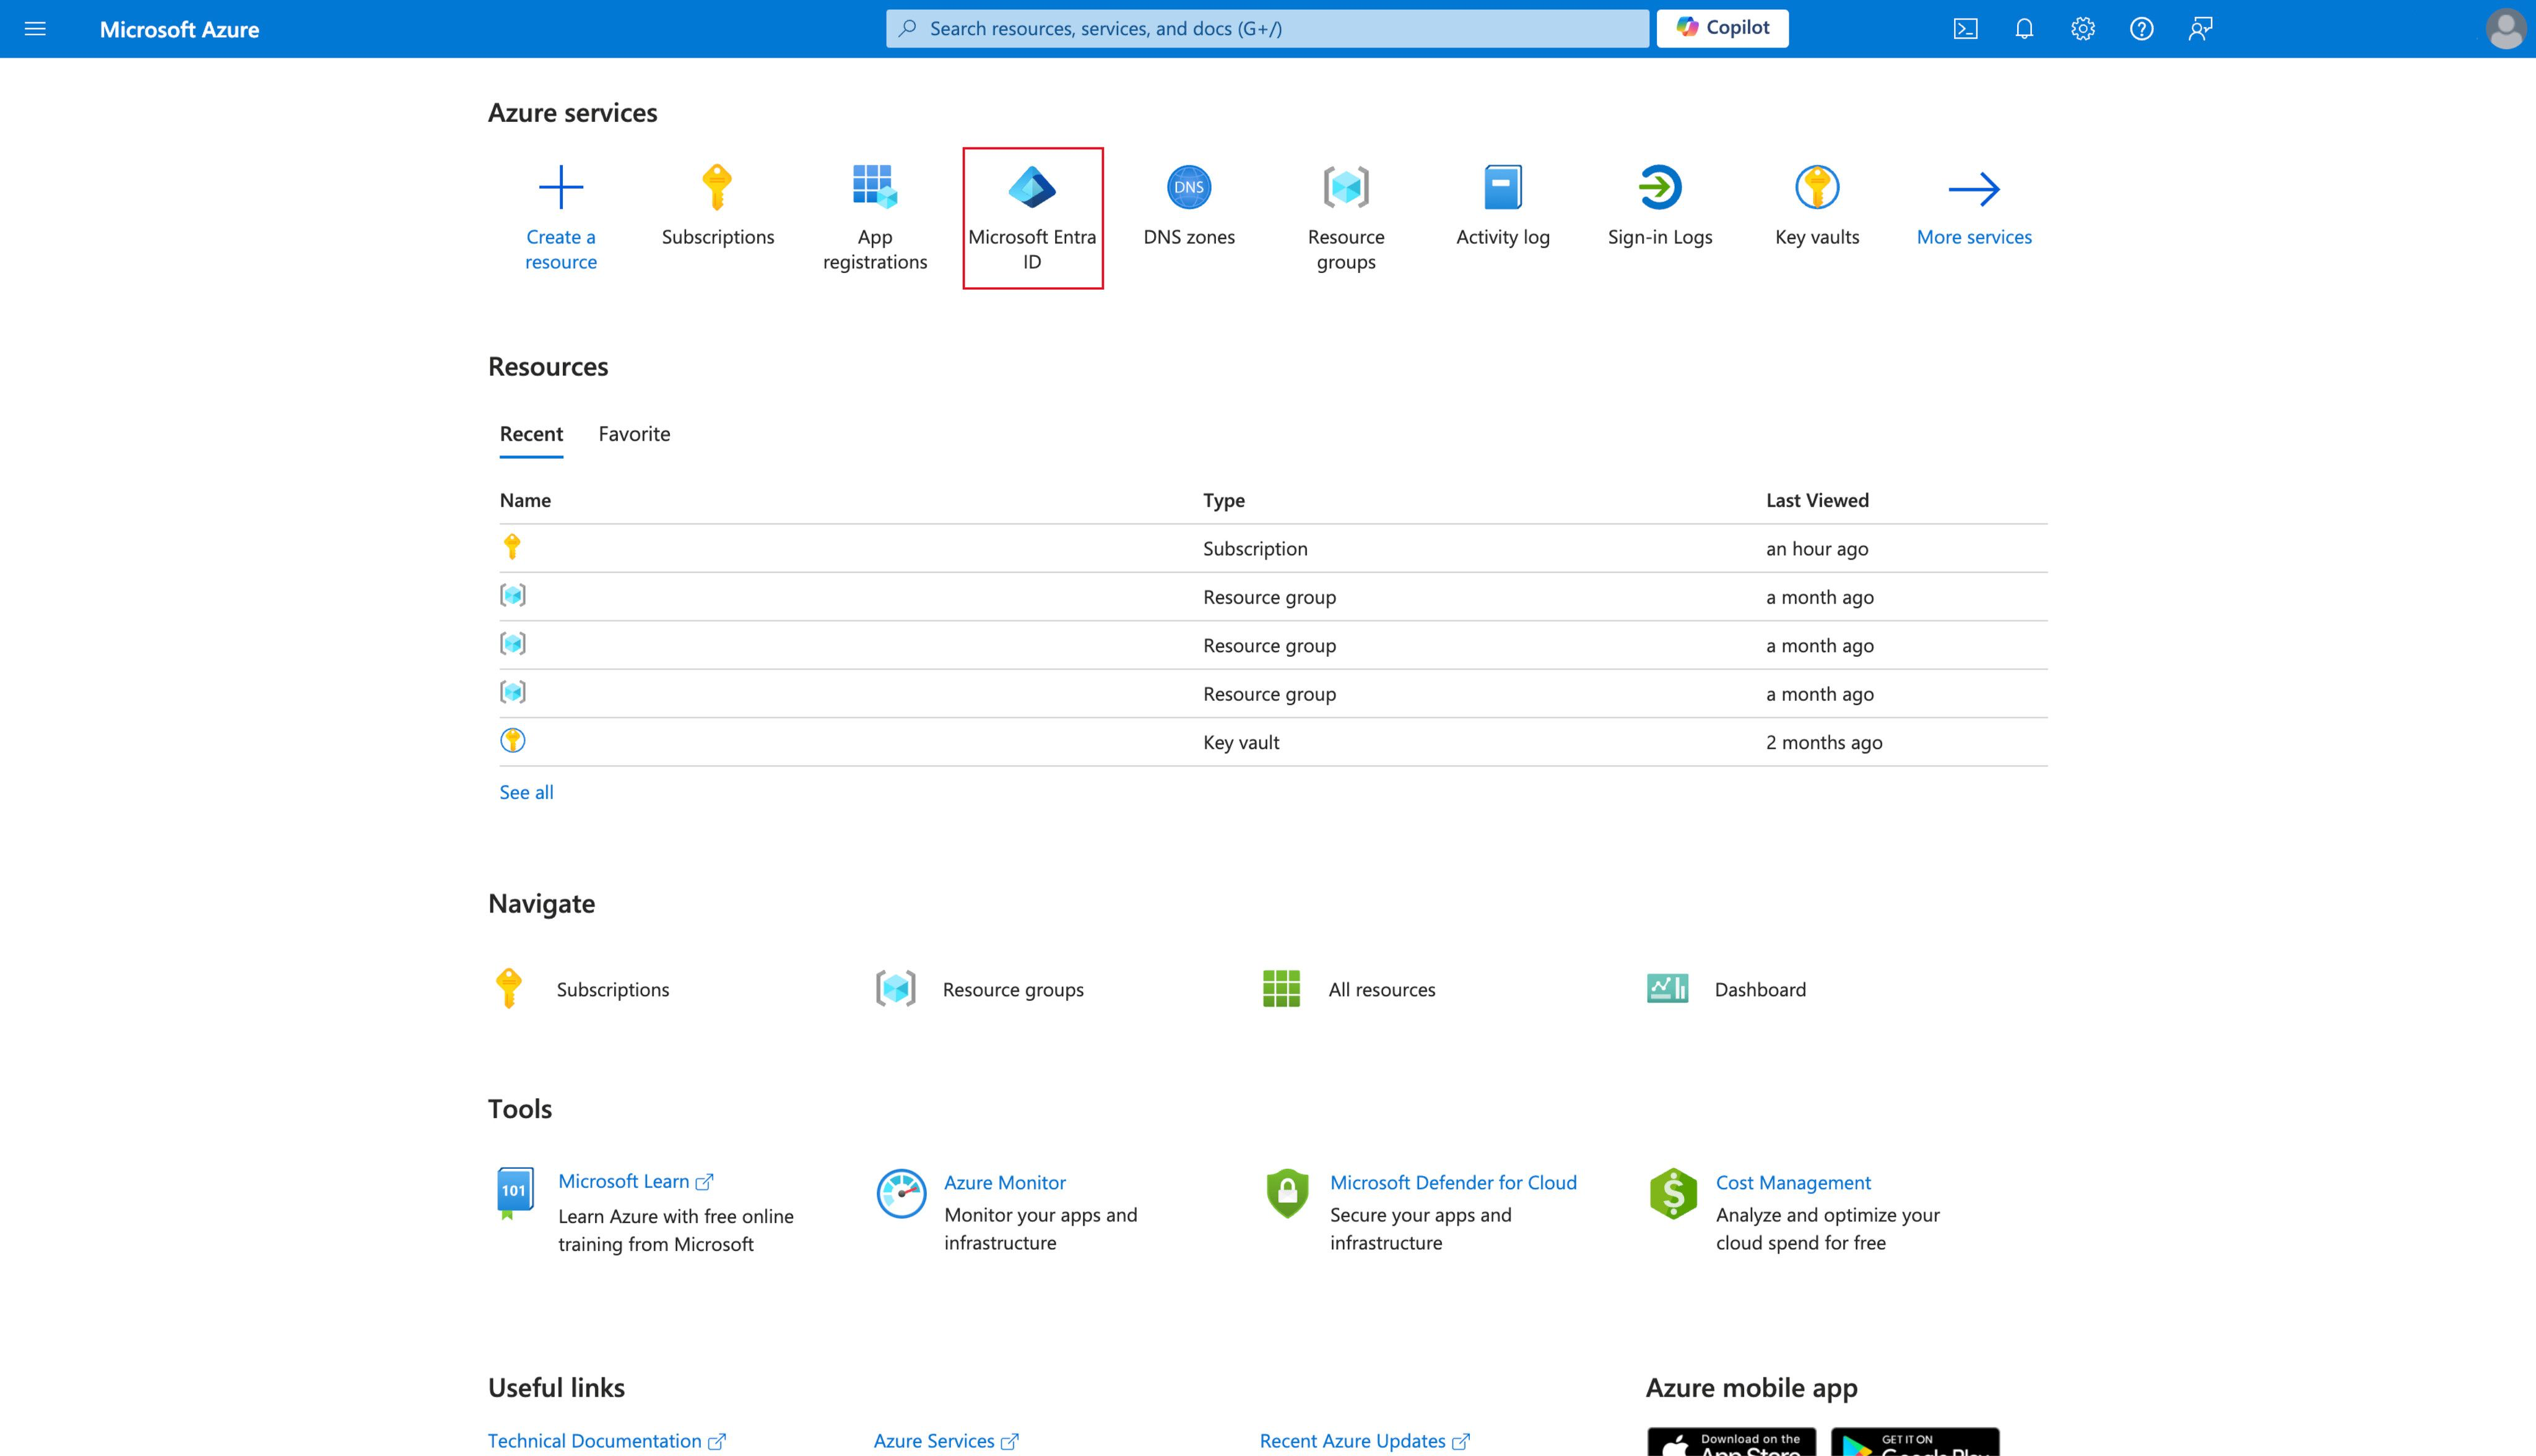
- Navigate to Microsoft Entra ID.
- Copy the unique Tenant ID string.

- Navigate to Microsoft Entra ID.
- Client ID:
- Navigate to App registrations.

- Select your application (in this example, ConstellixDNS is selected).
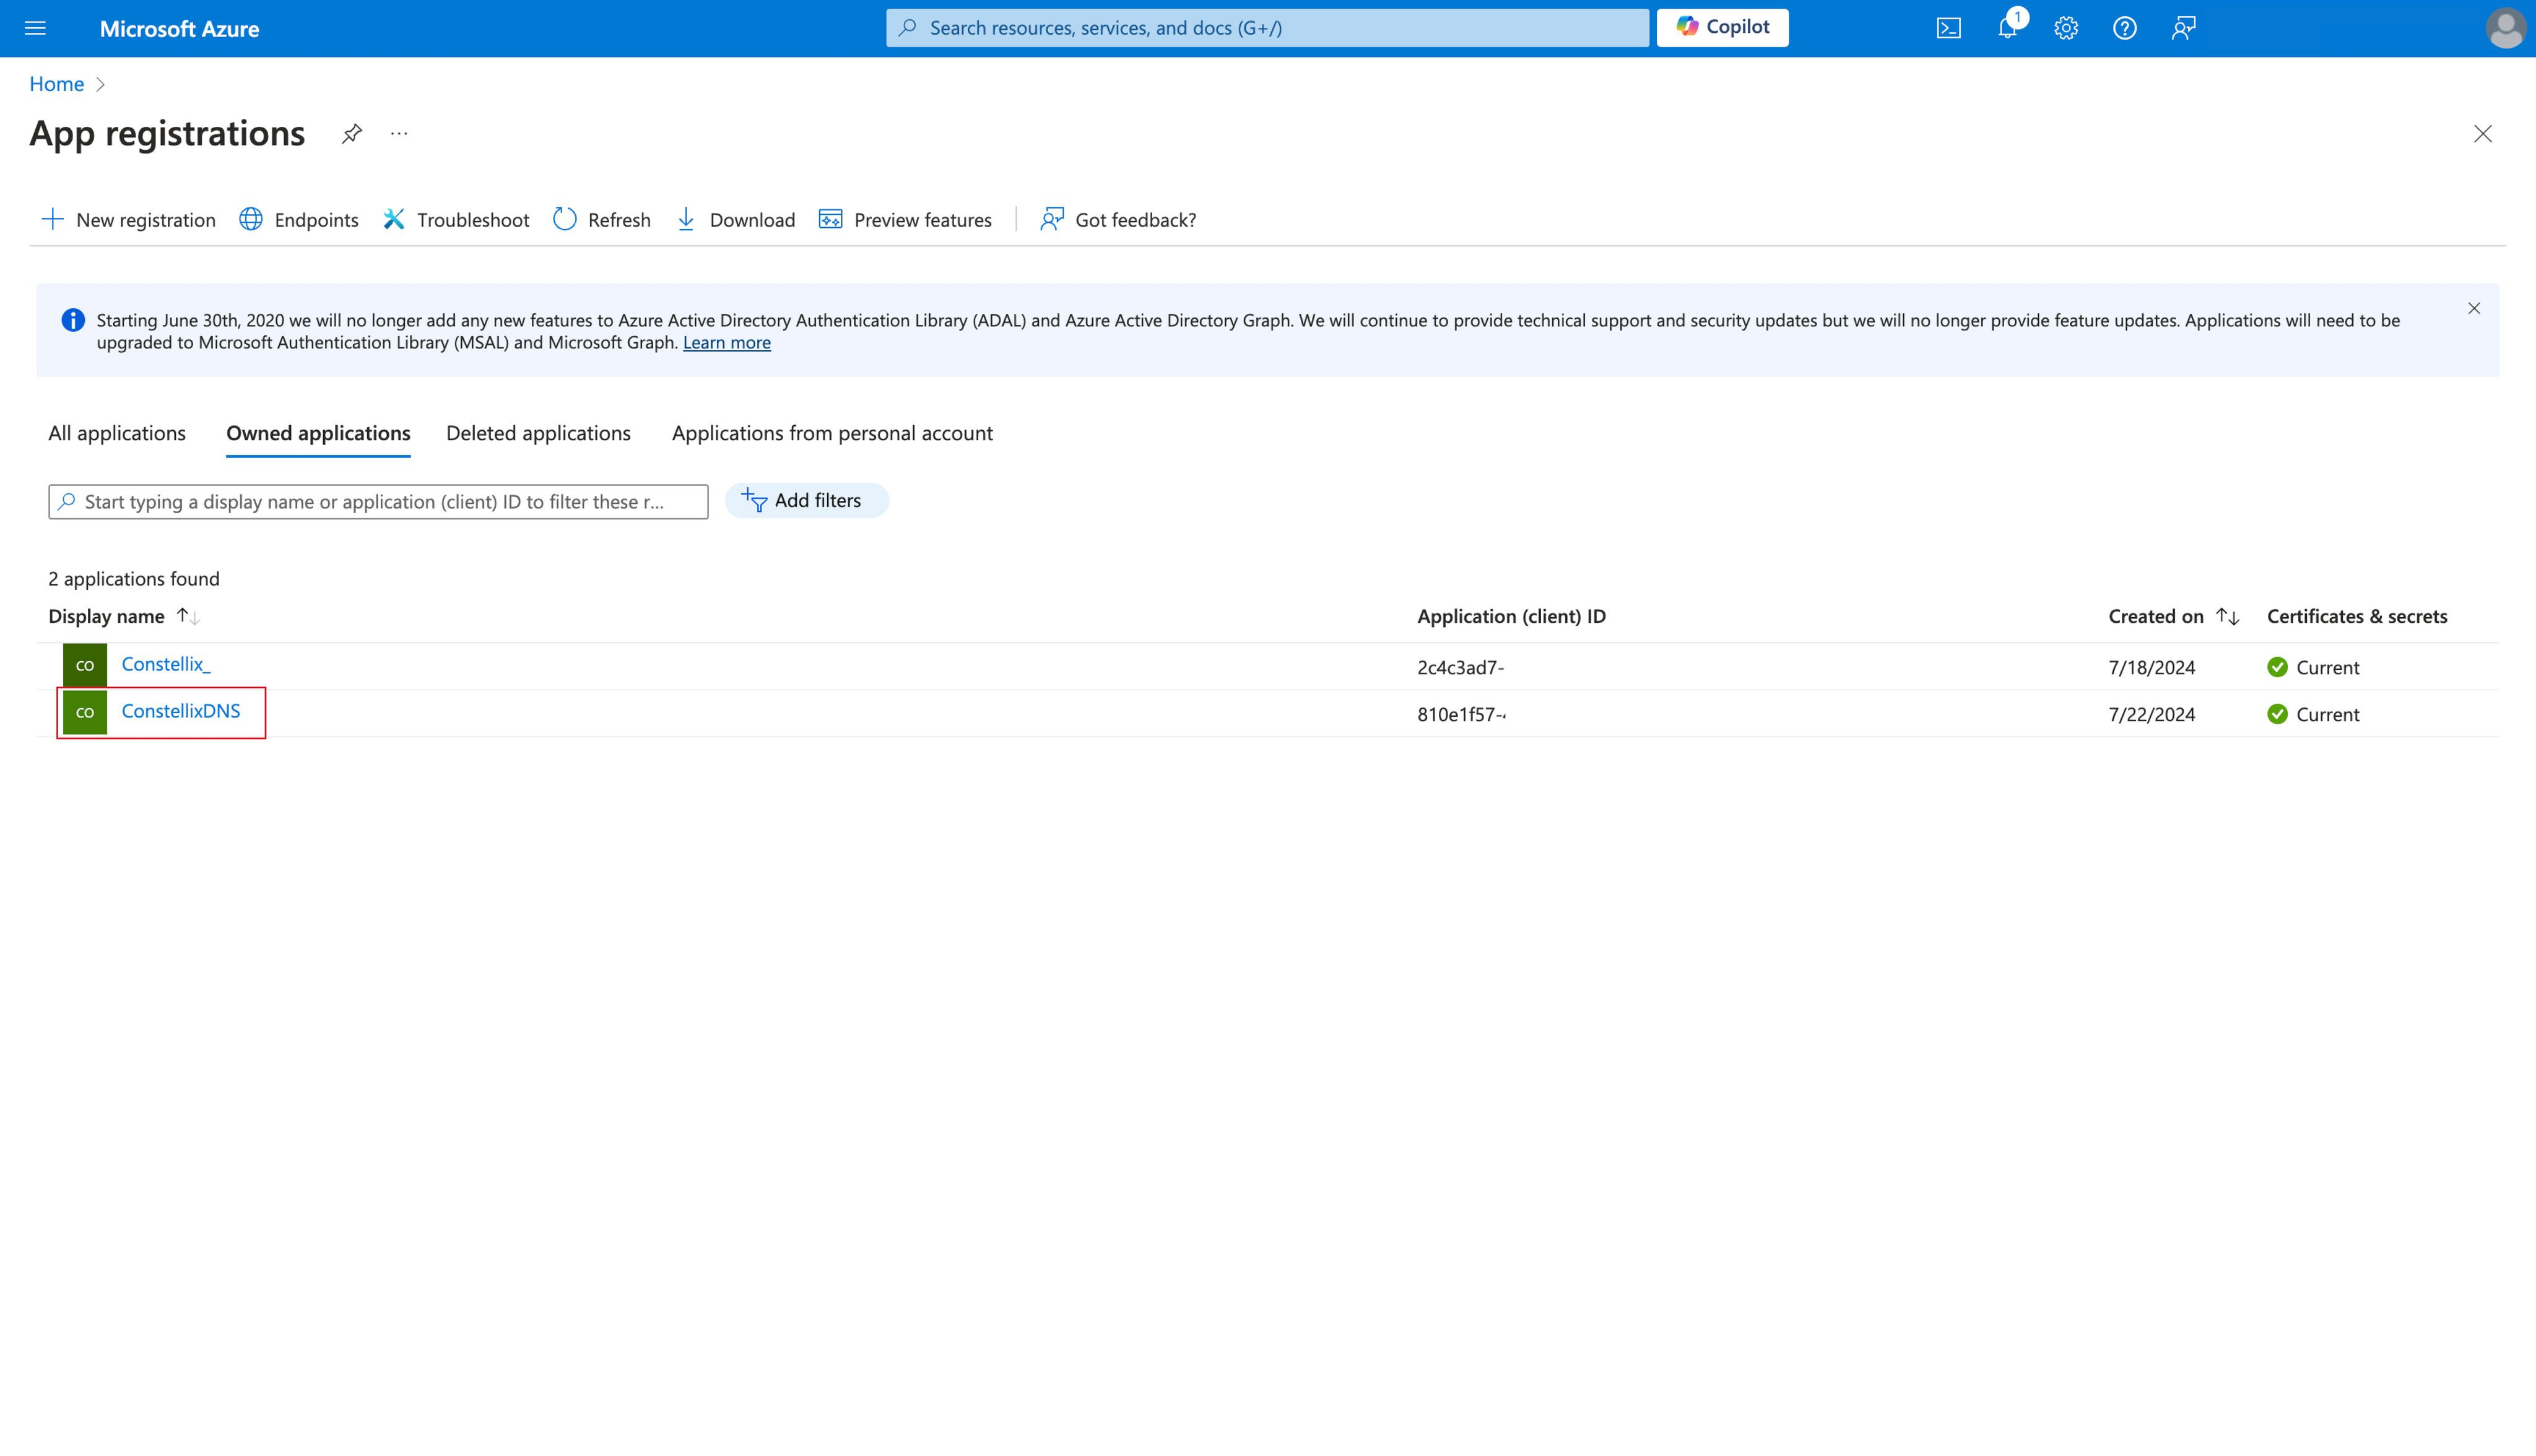
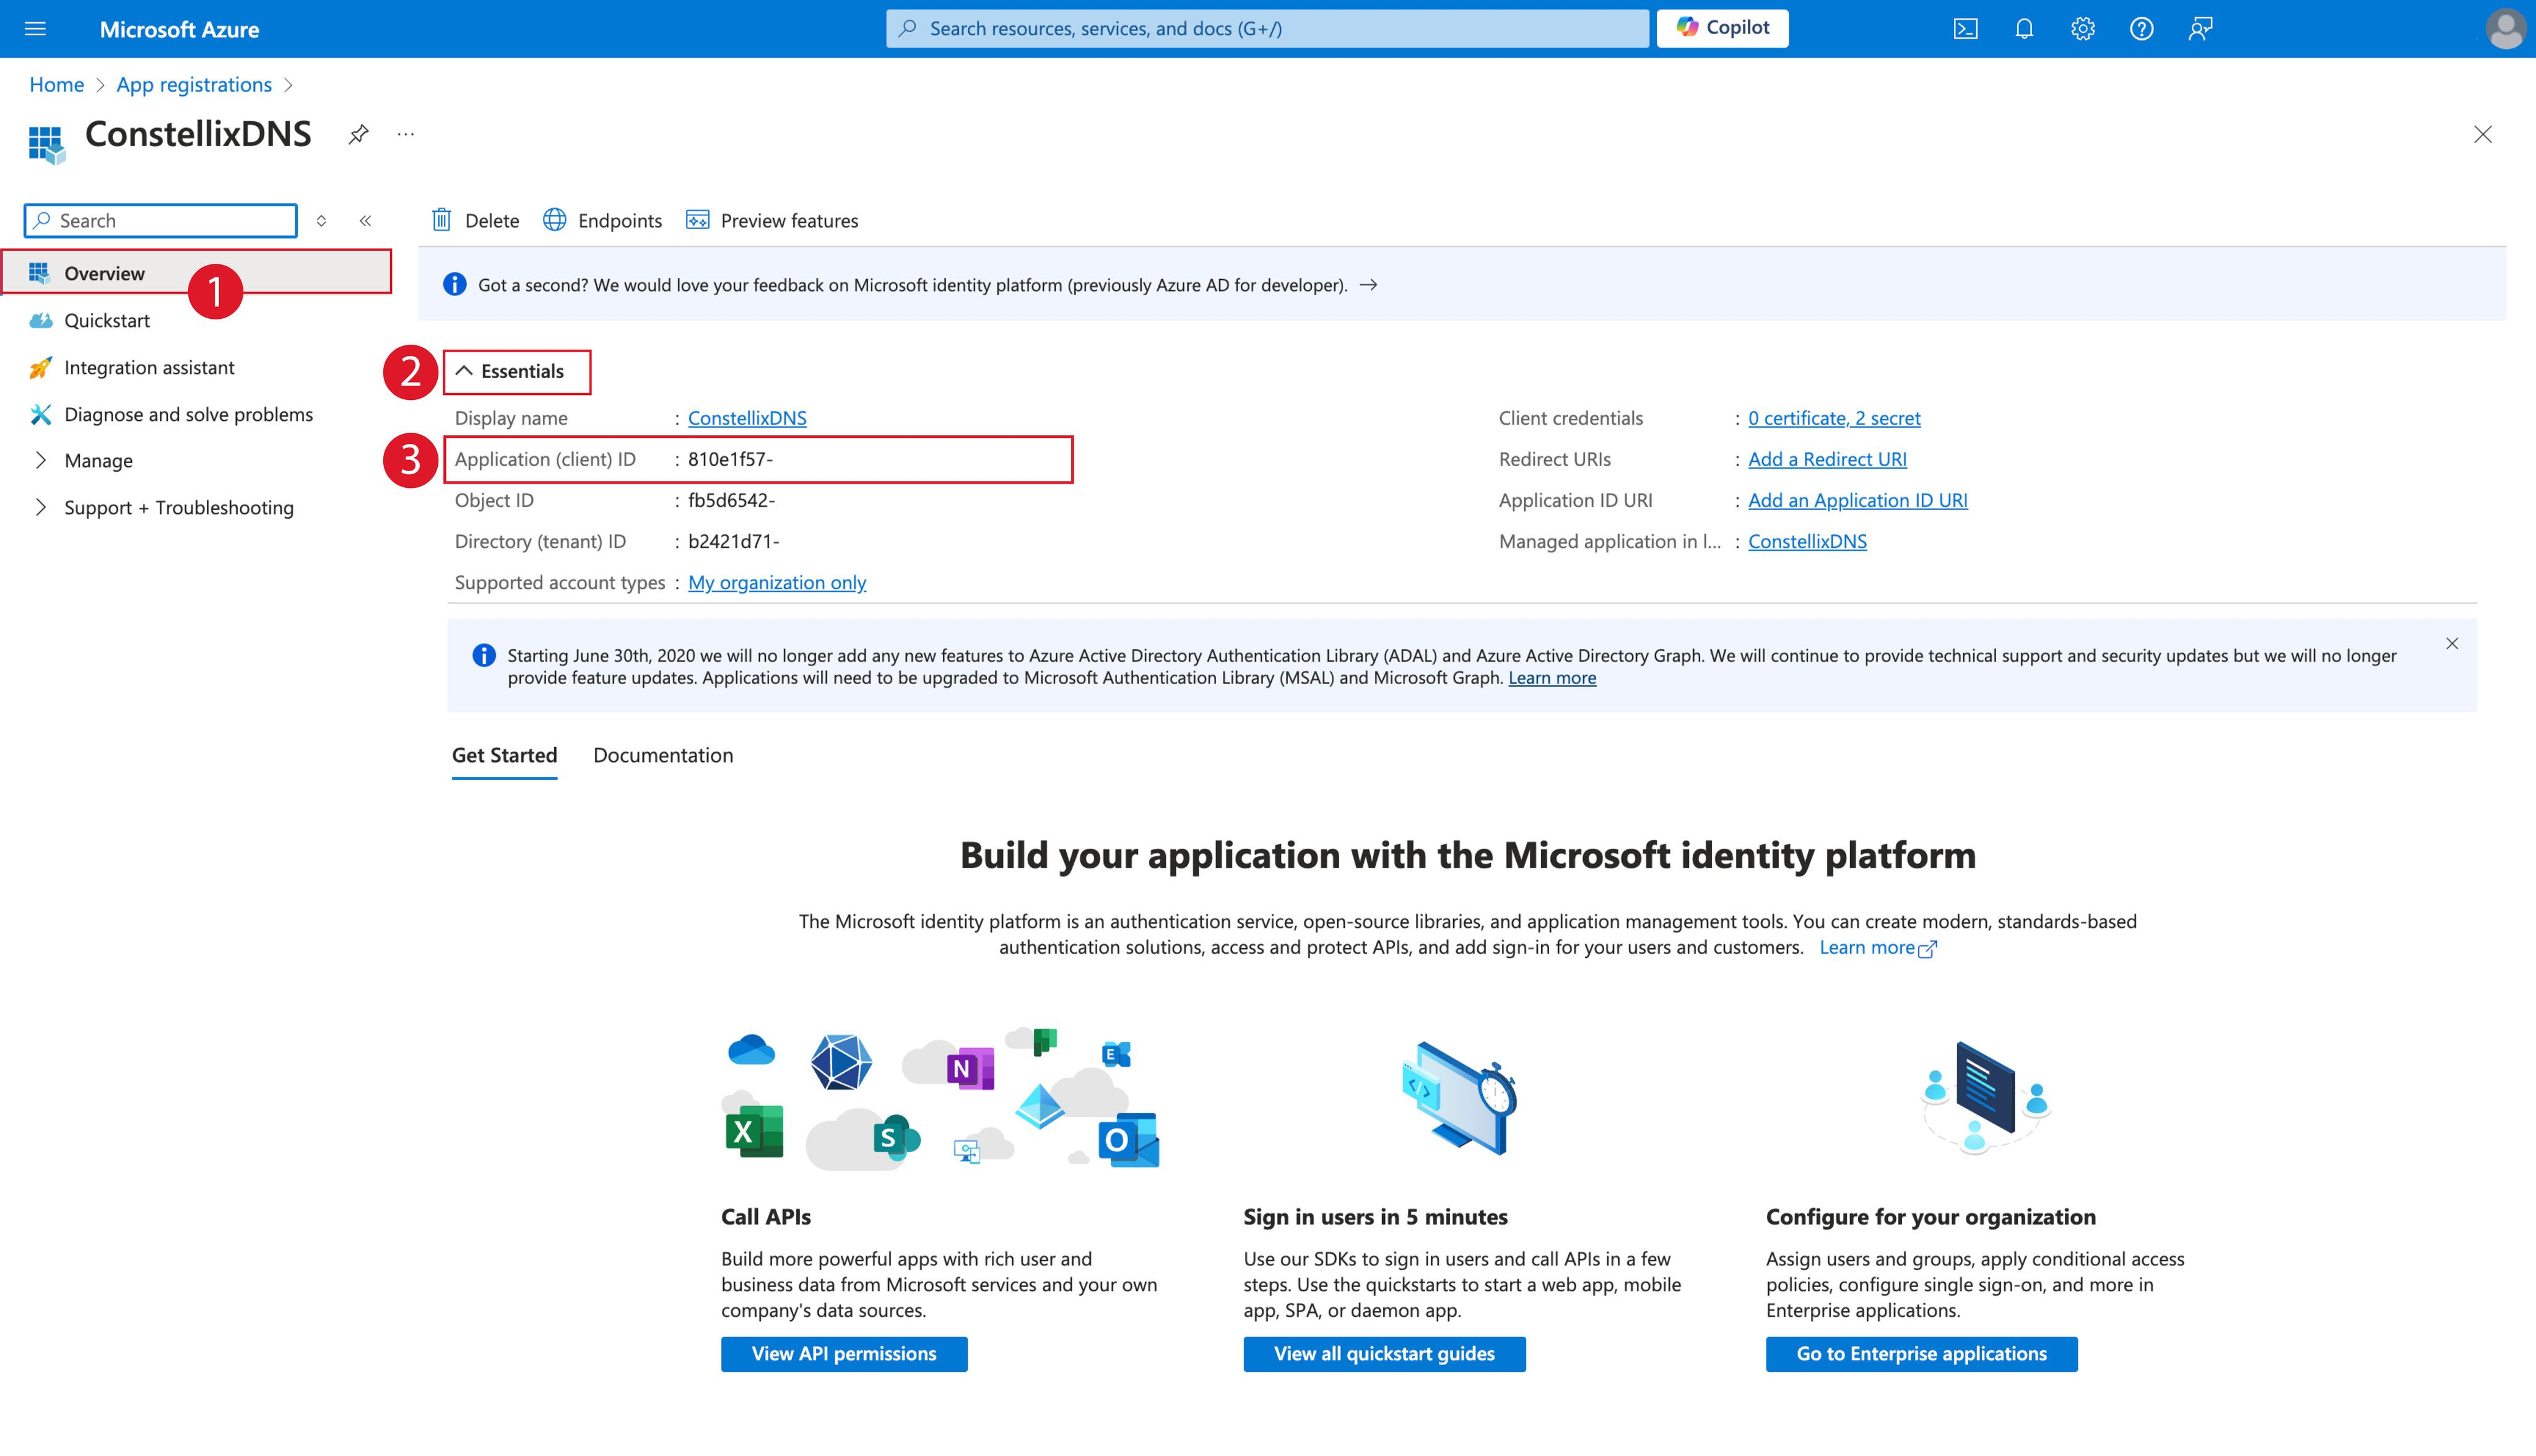
- Click Overview > Essentials, and copy the unique Application (client) ID string.
- Navigate to App registrations.
- Client key:
- Navigate to App registrations.

- Select your application (in this example, ConstellixDNS is selected).

- Click Overview > Essentials > Display name (in this example, ConstellixDNS is clicked).

- Click Manage > Certificates & secrets > New client secret.
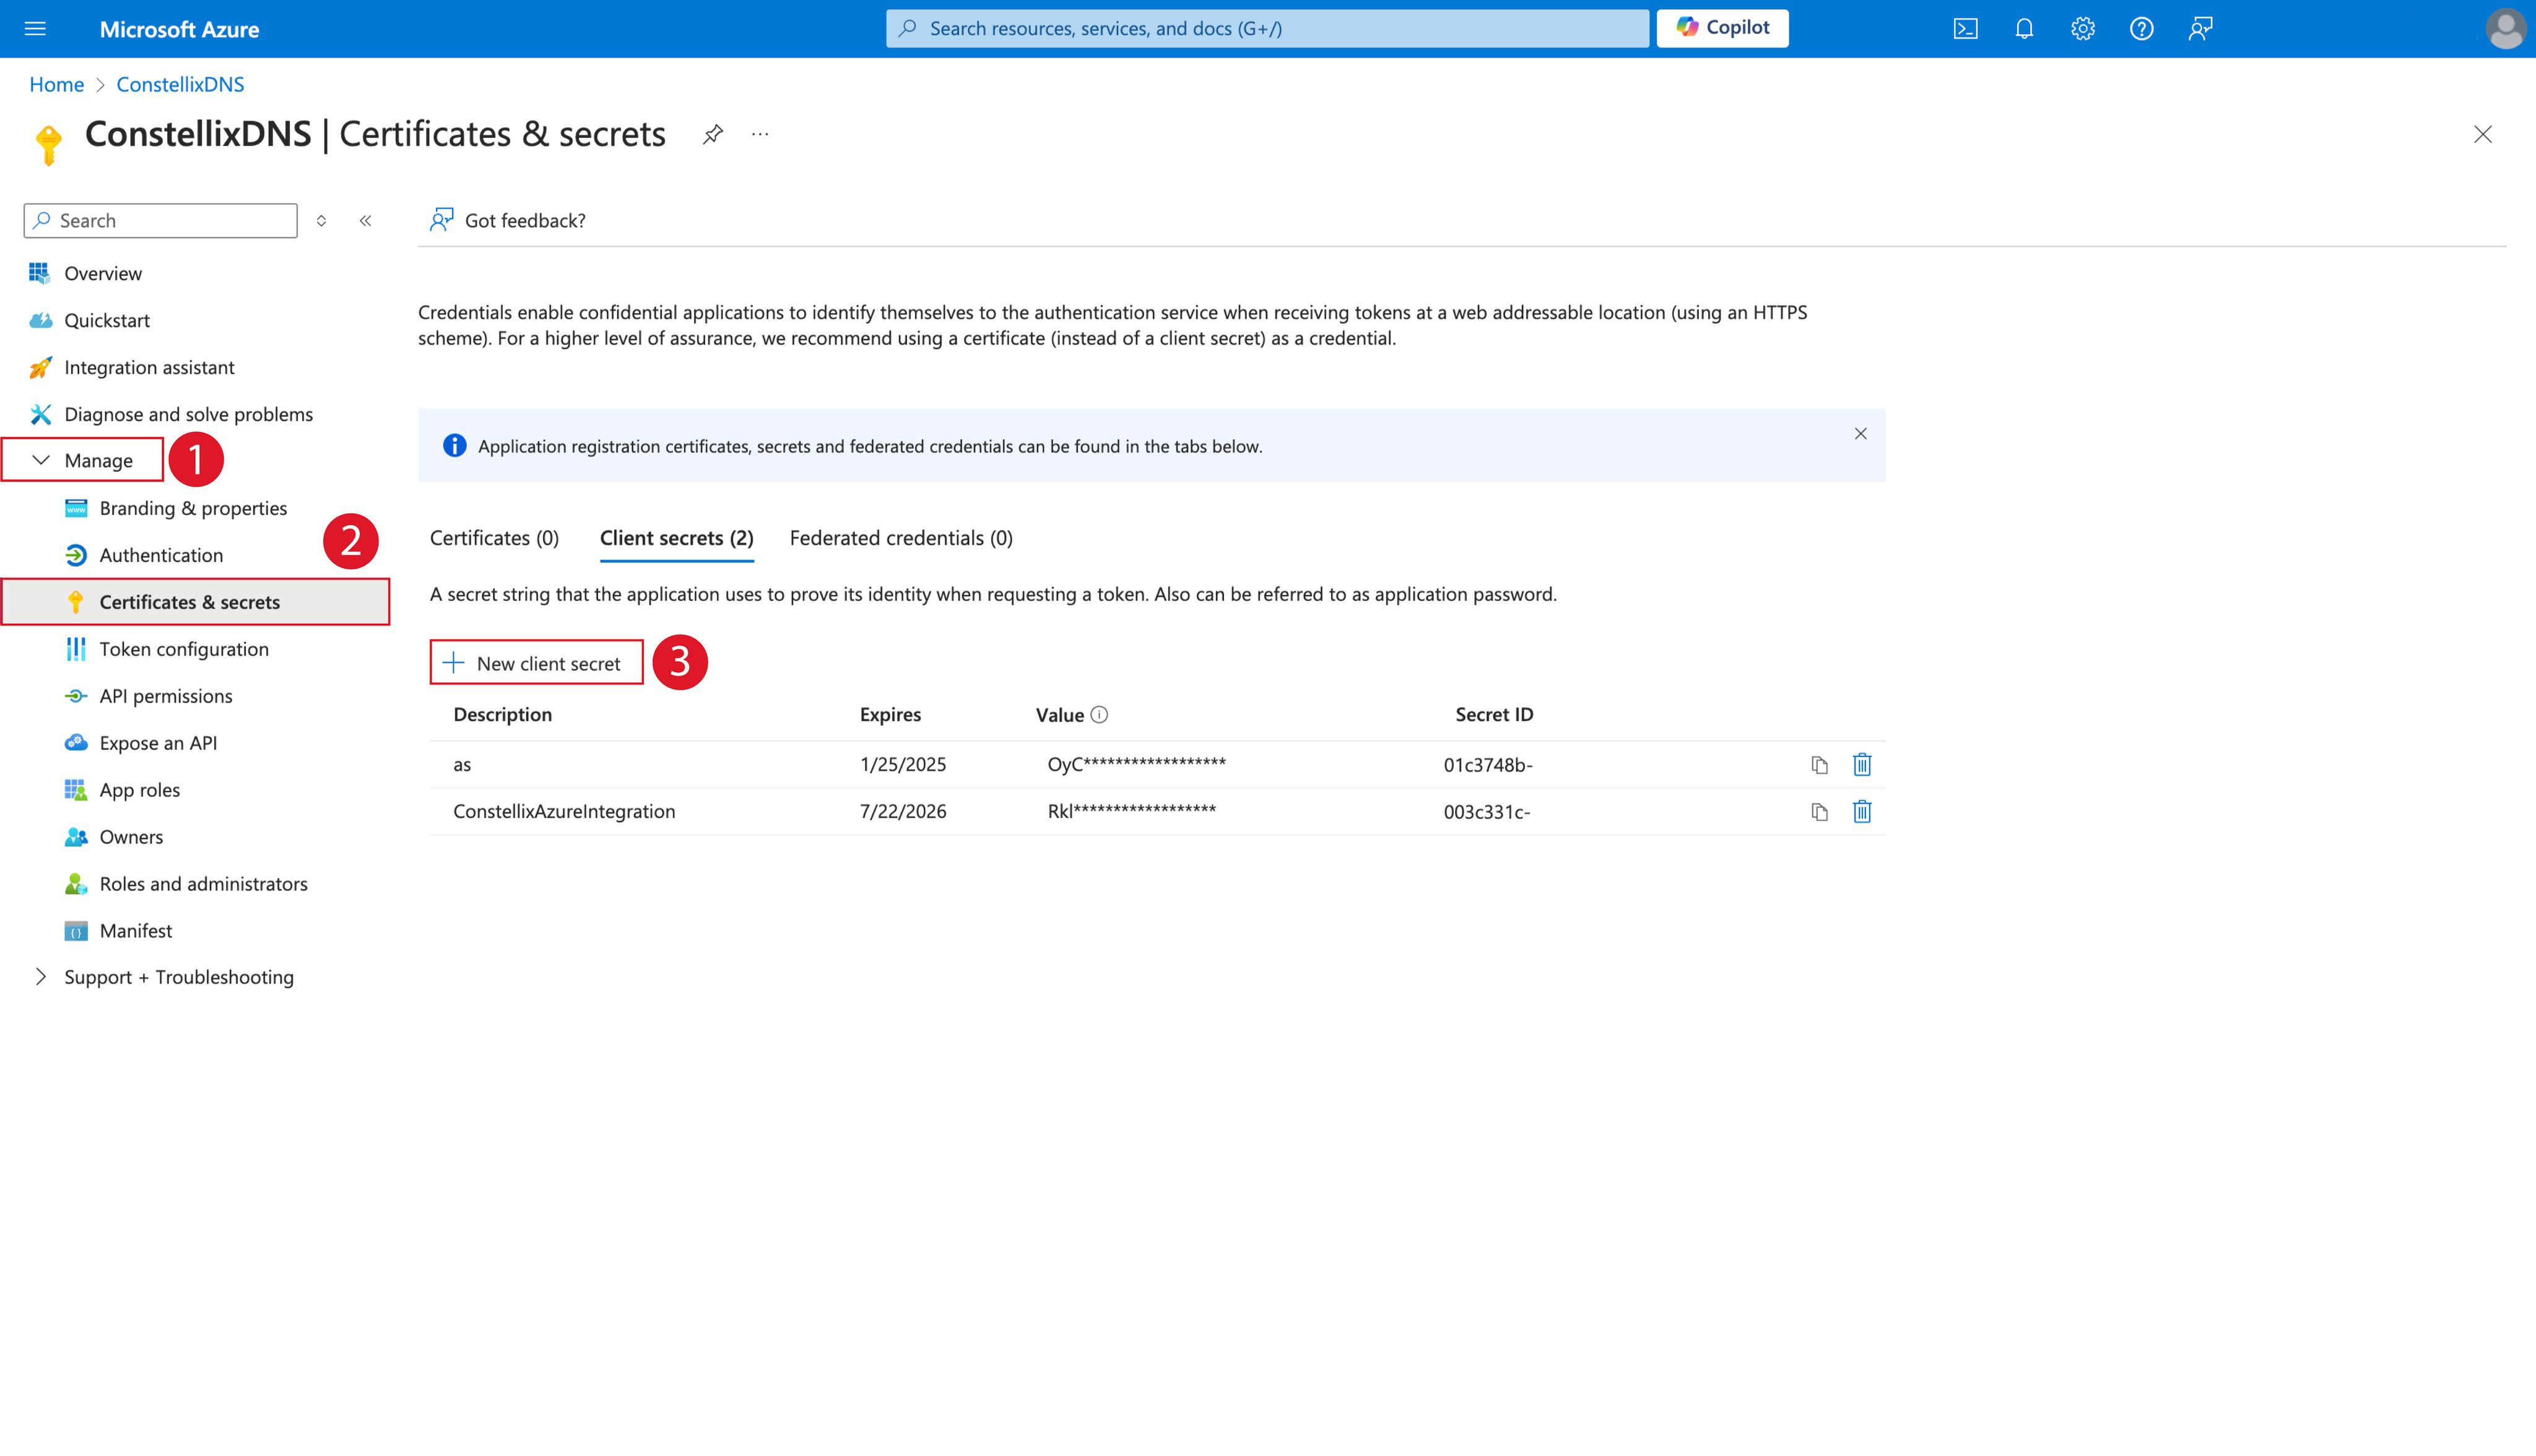
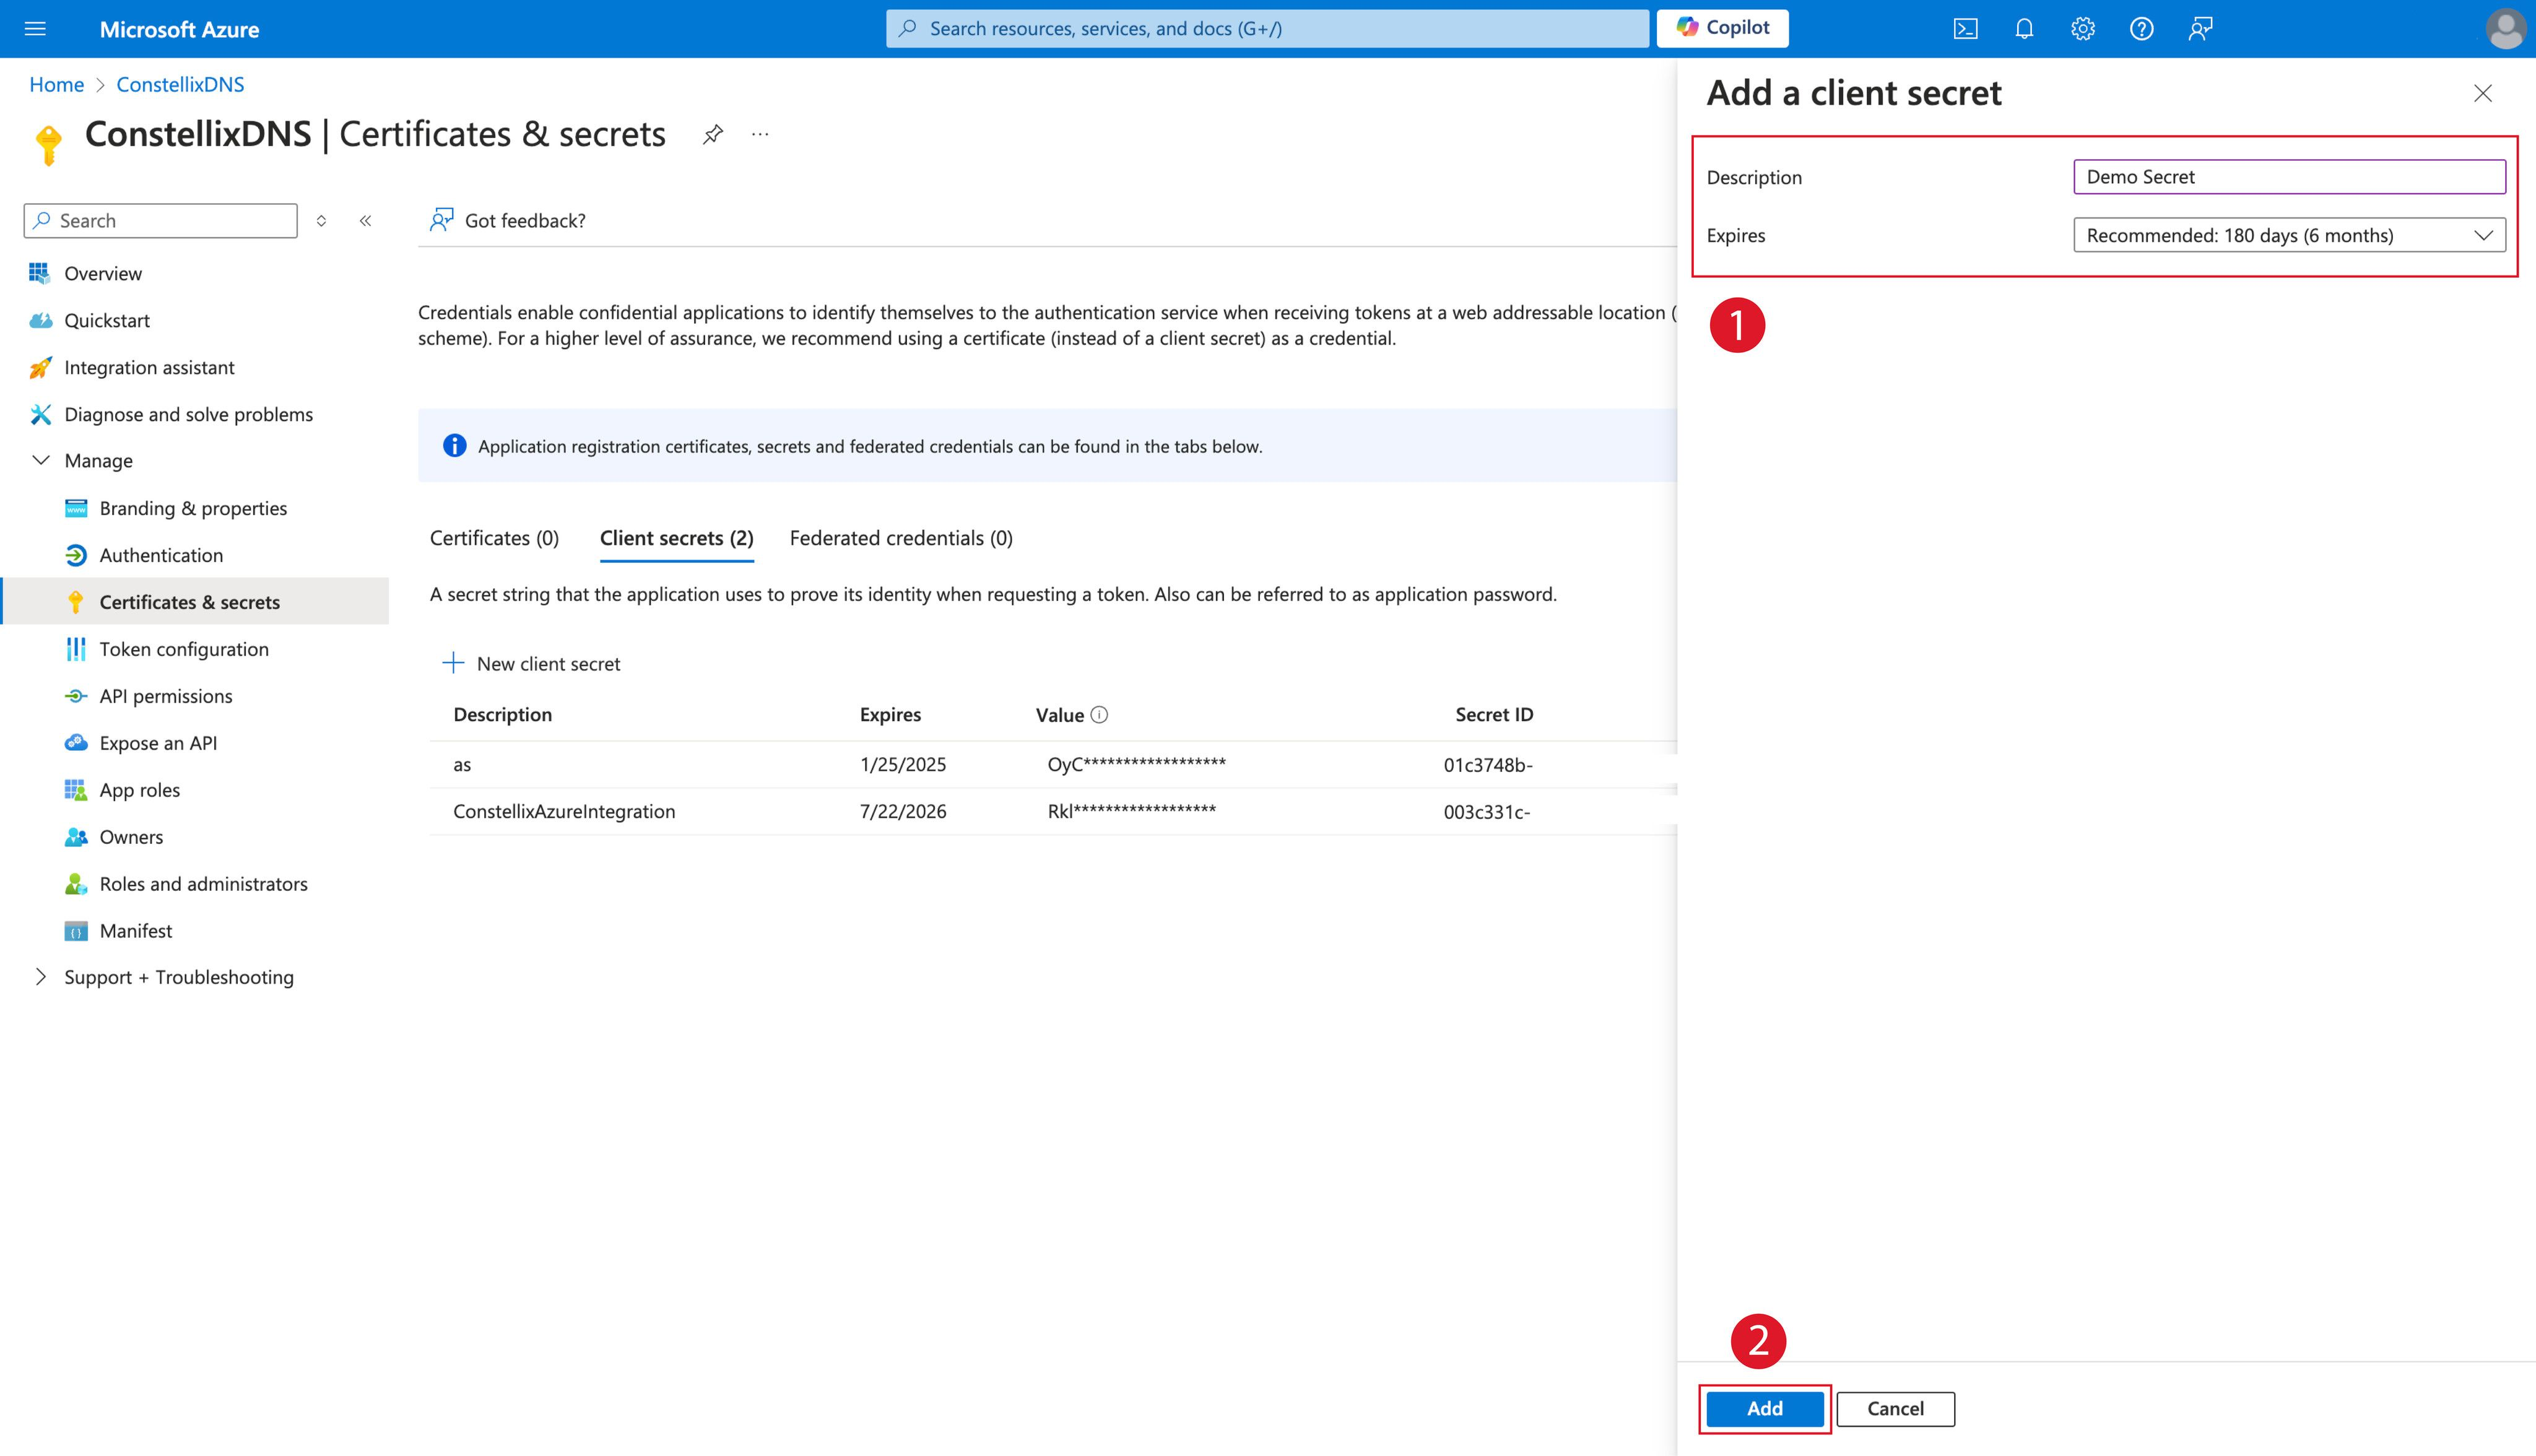
- Populate the Description field and select the desired timeframe from the Expires drop-down list, then click Add.
- Copy your newly-created secret’s Value string. Note that once the Certificates & secrets page is closed, the Value string is obfuscated.

- Navigate to App registrations.
- Subscription ID:
- Configure access controls:
- Navigate to Subscriptions.
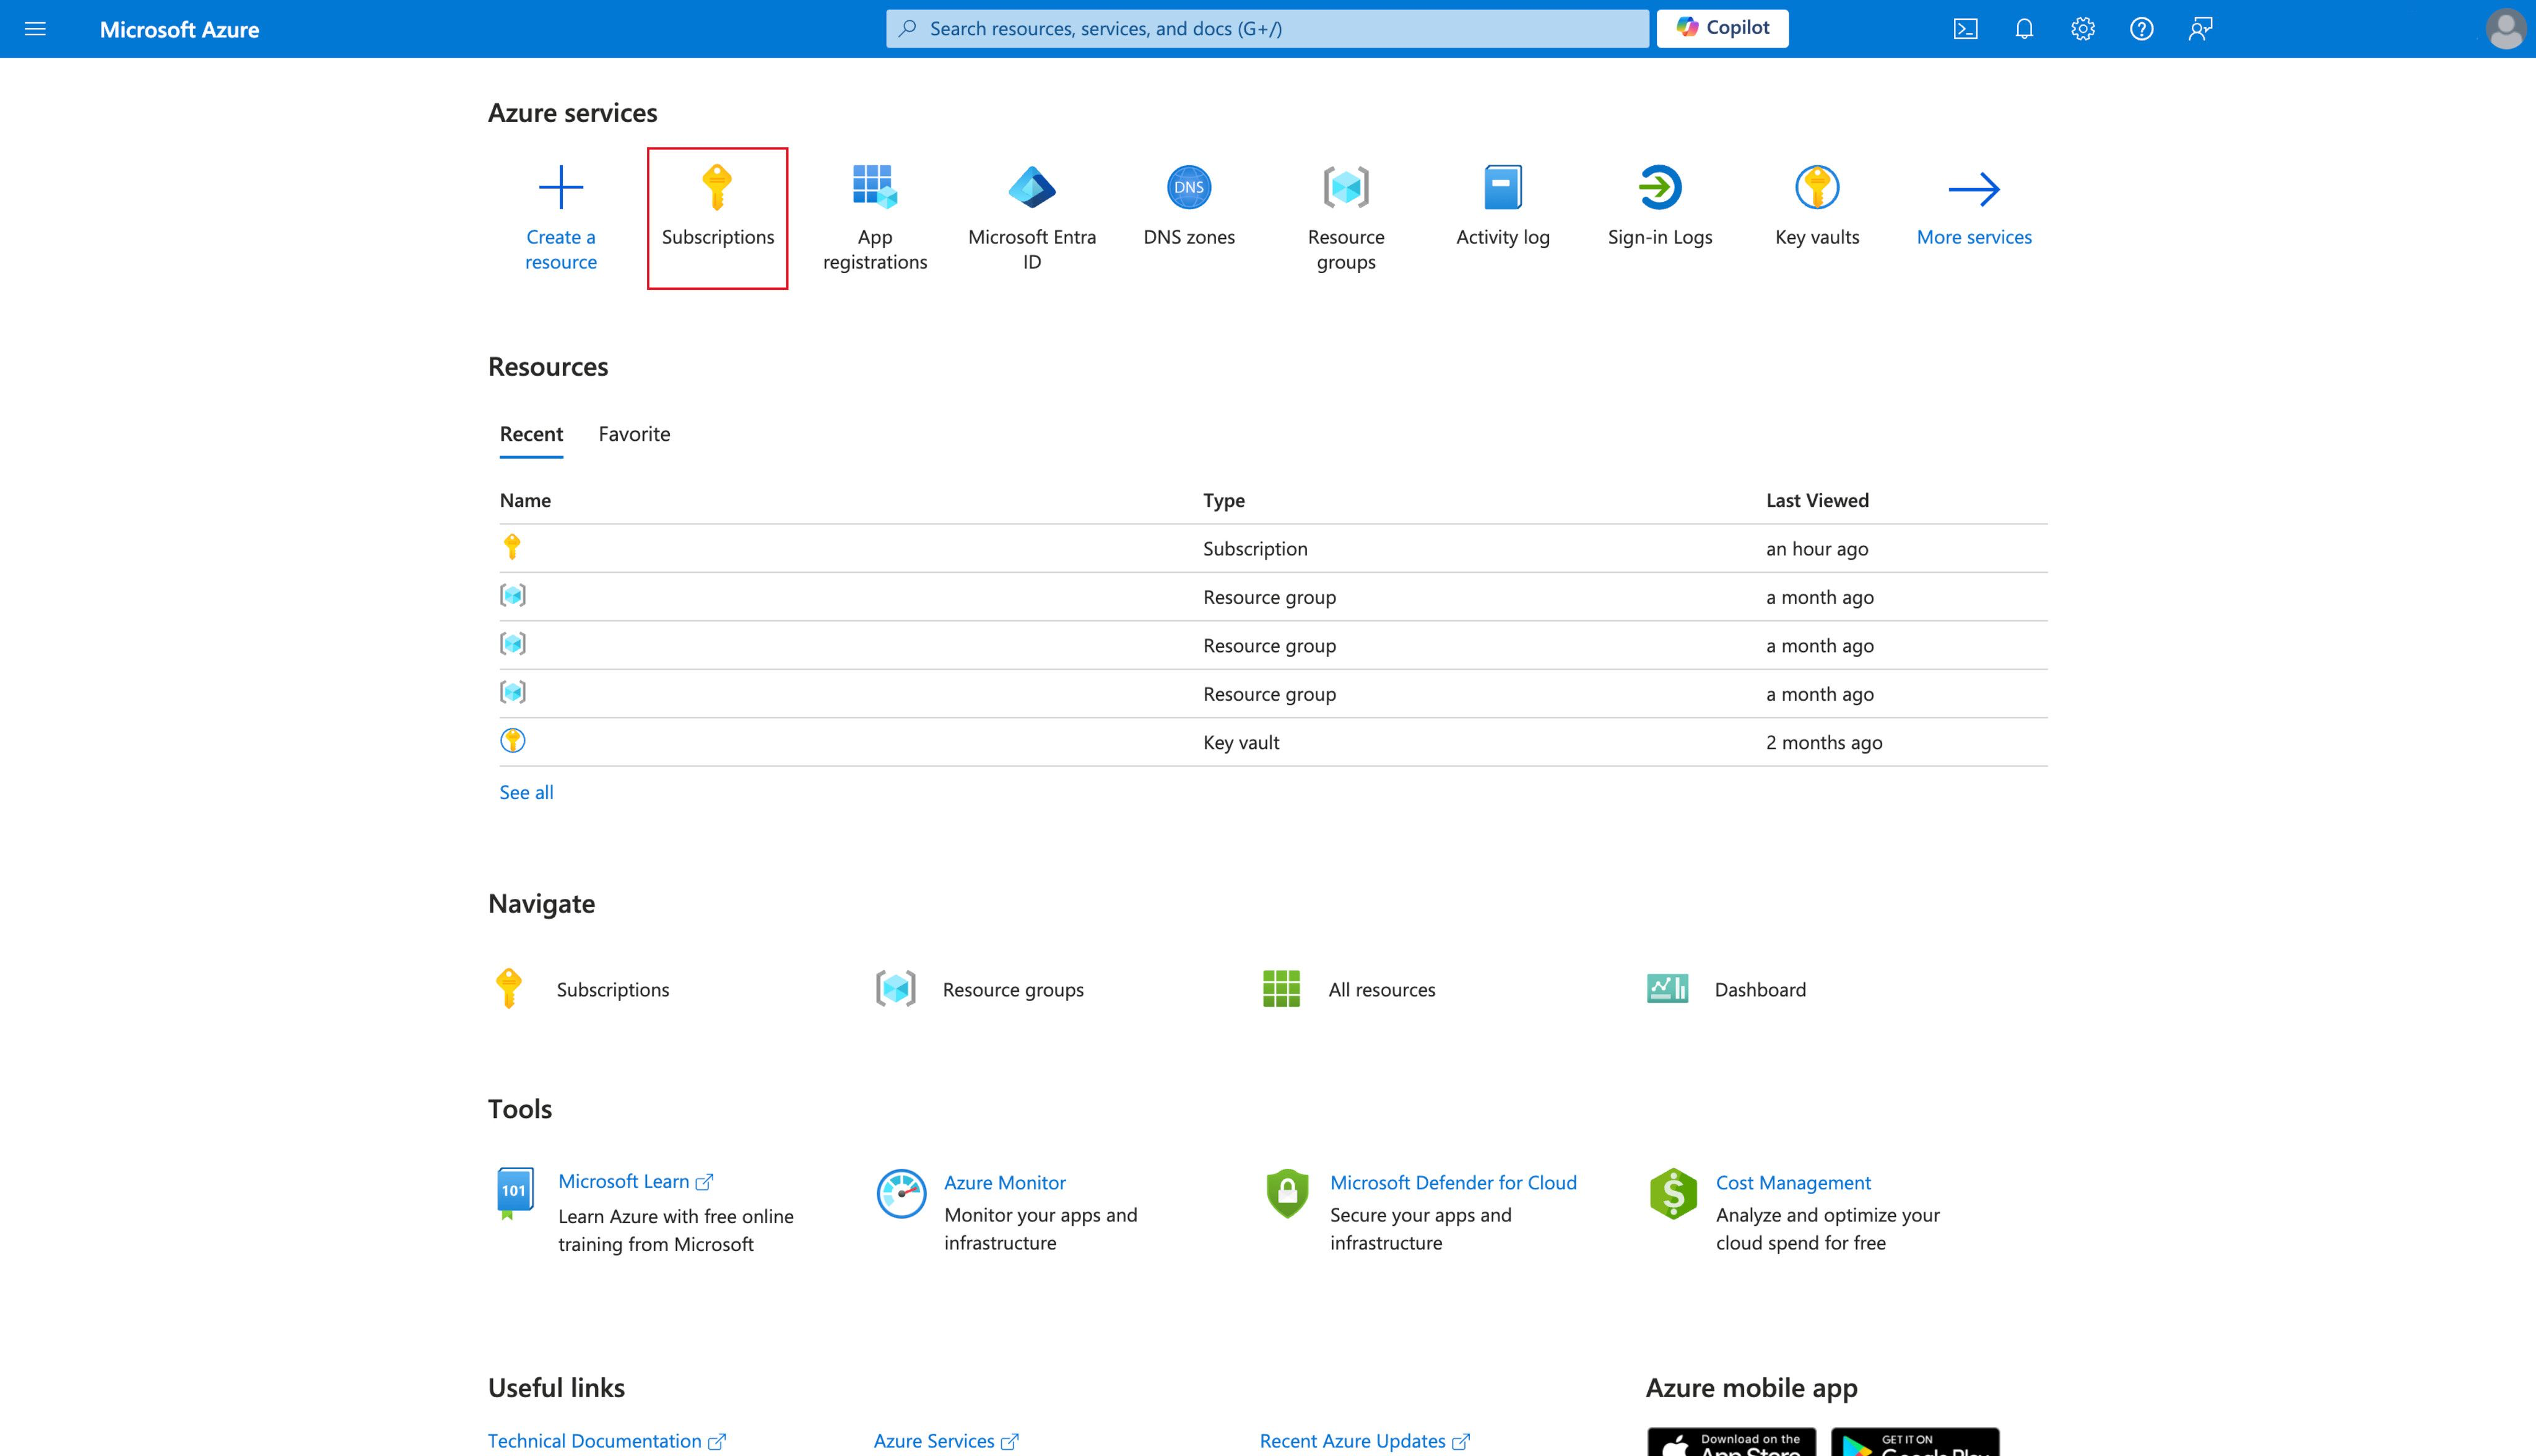
- Select your subscription (in this example, Azure subscription 1 is selected).
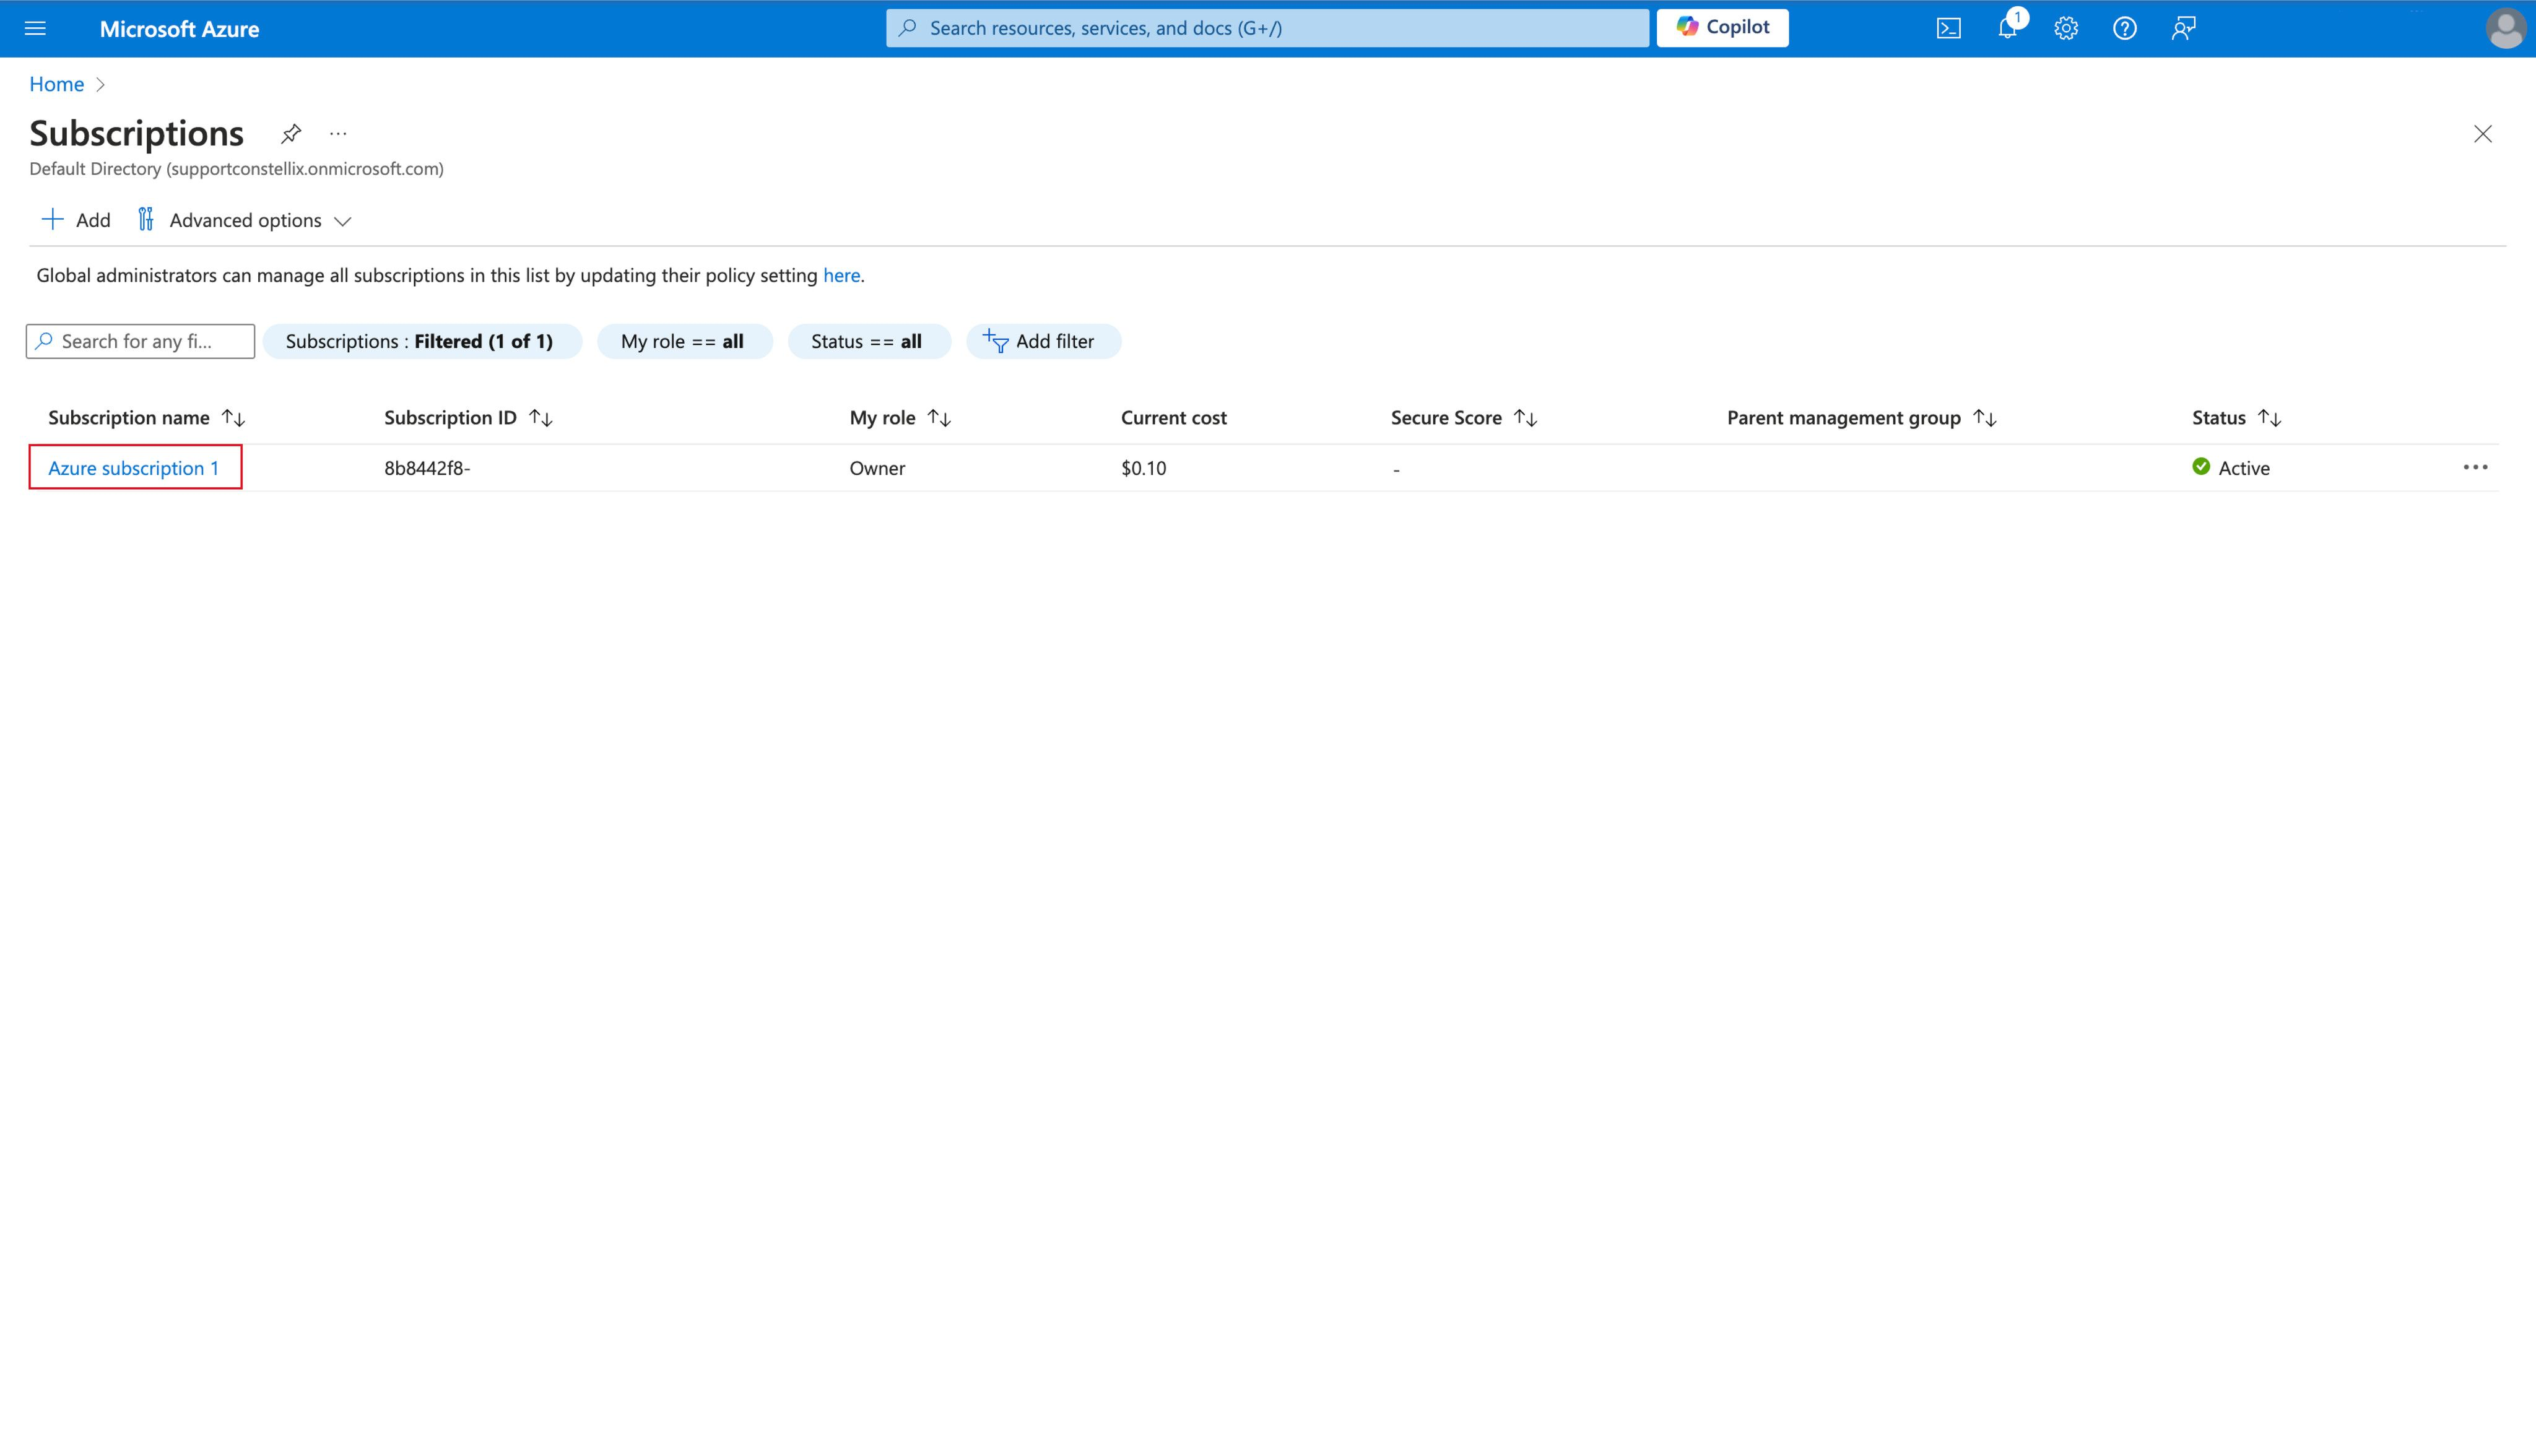
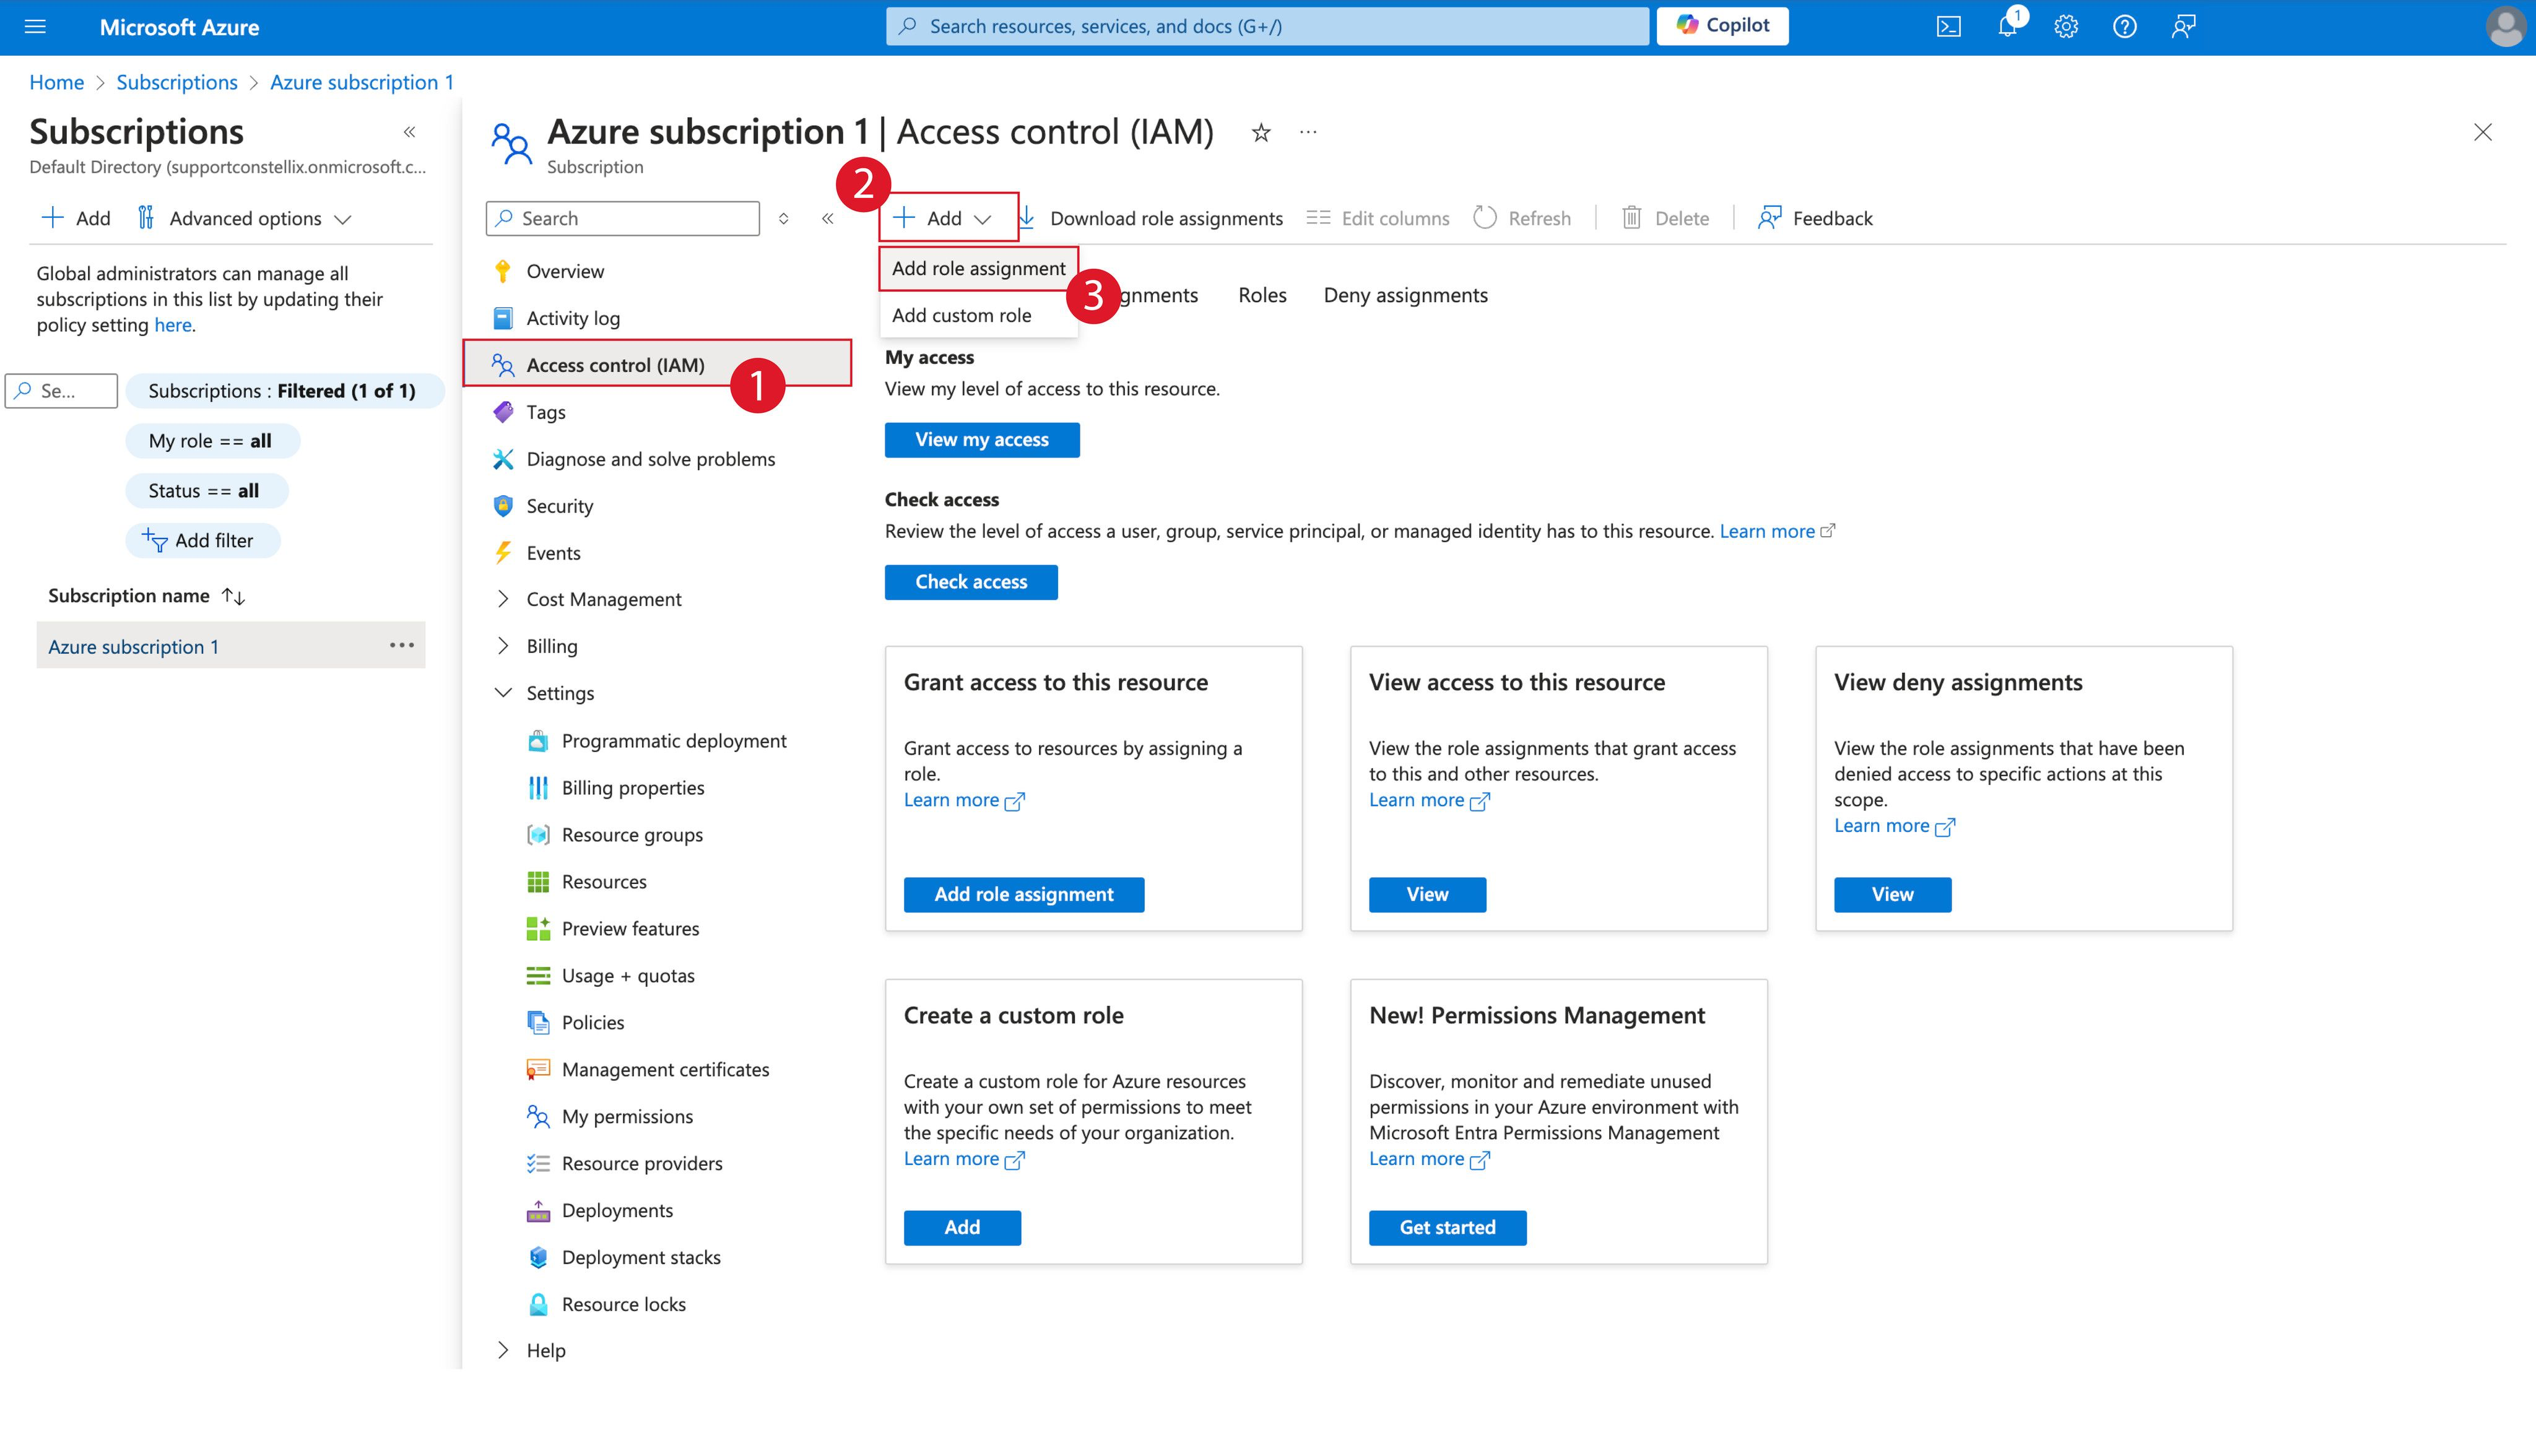
- Click Access control (IAM) > Add, and select Add role assignment from the list.
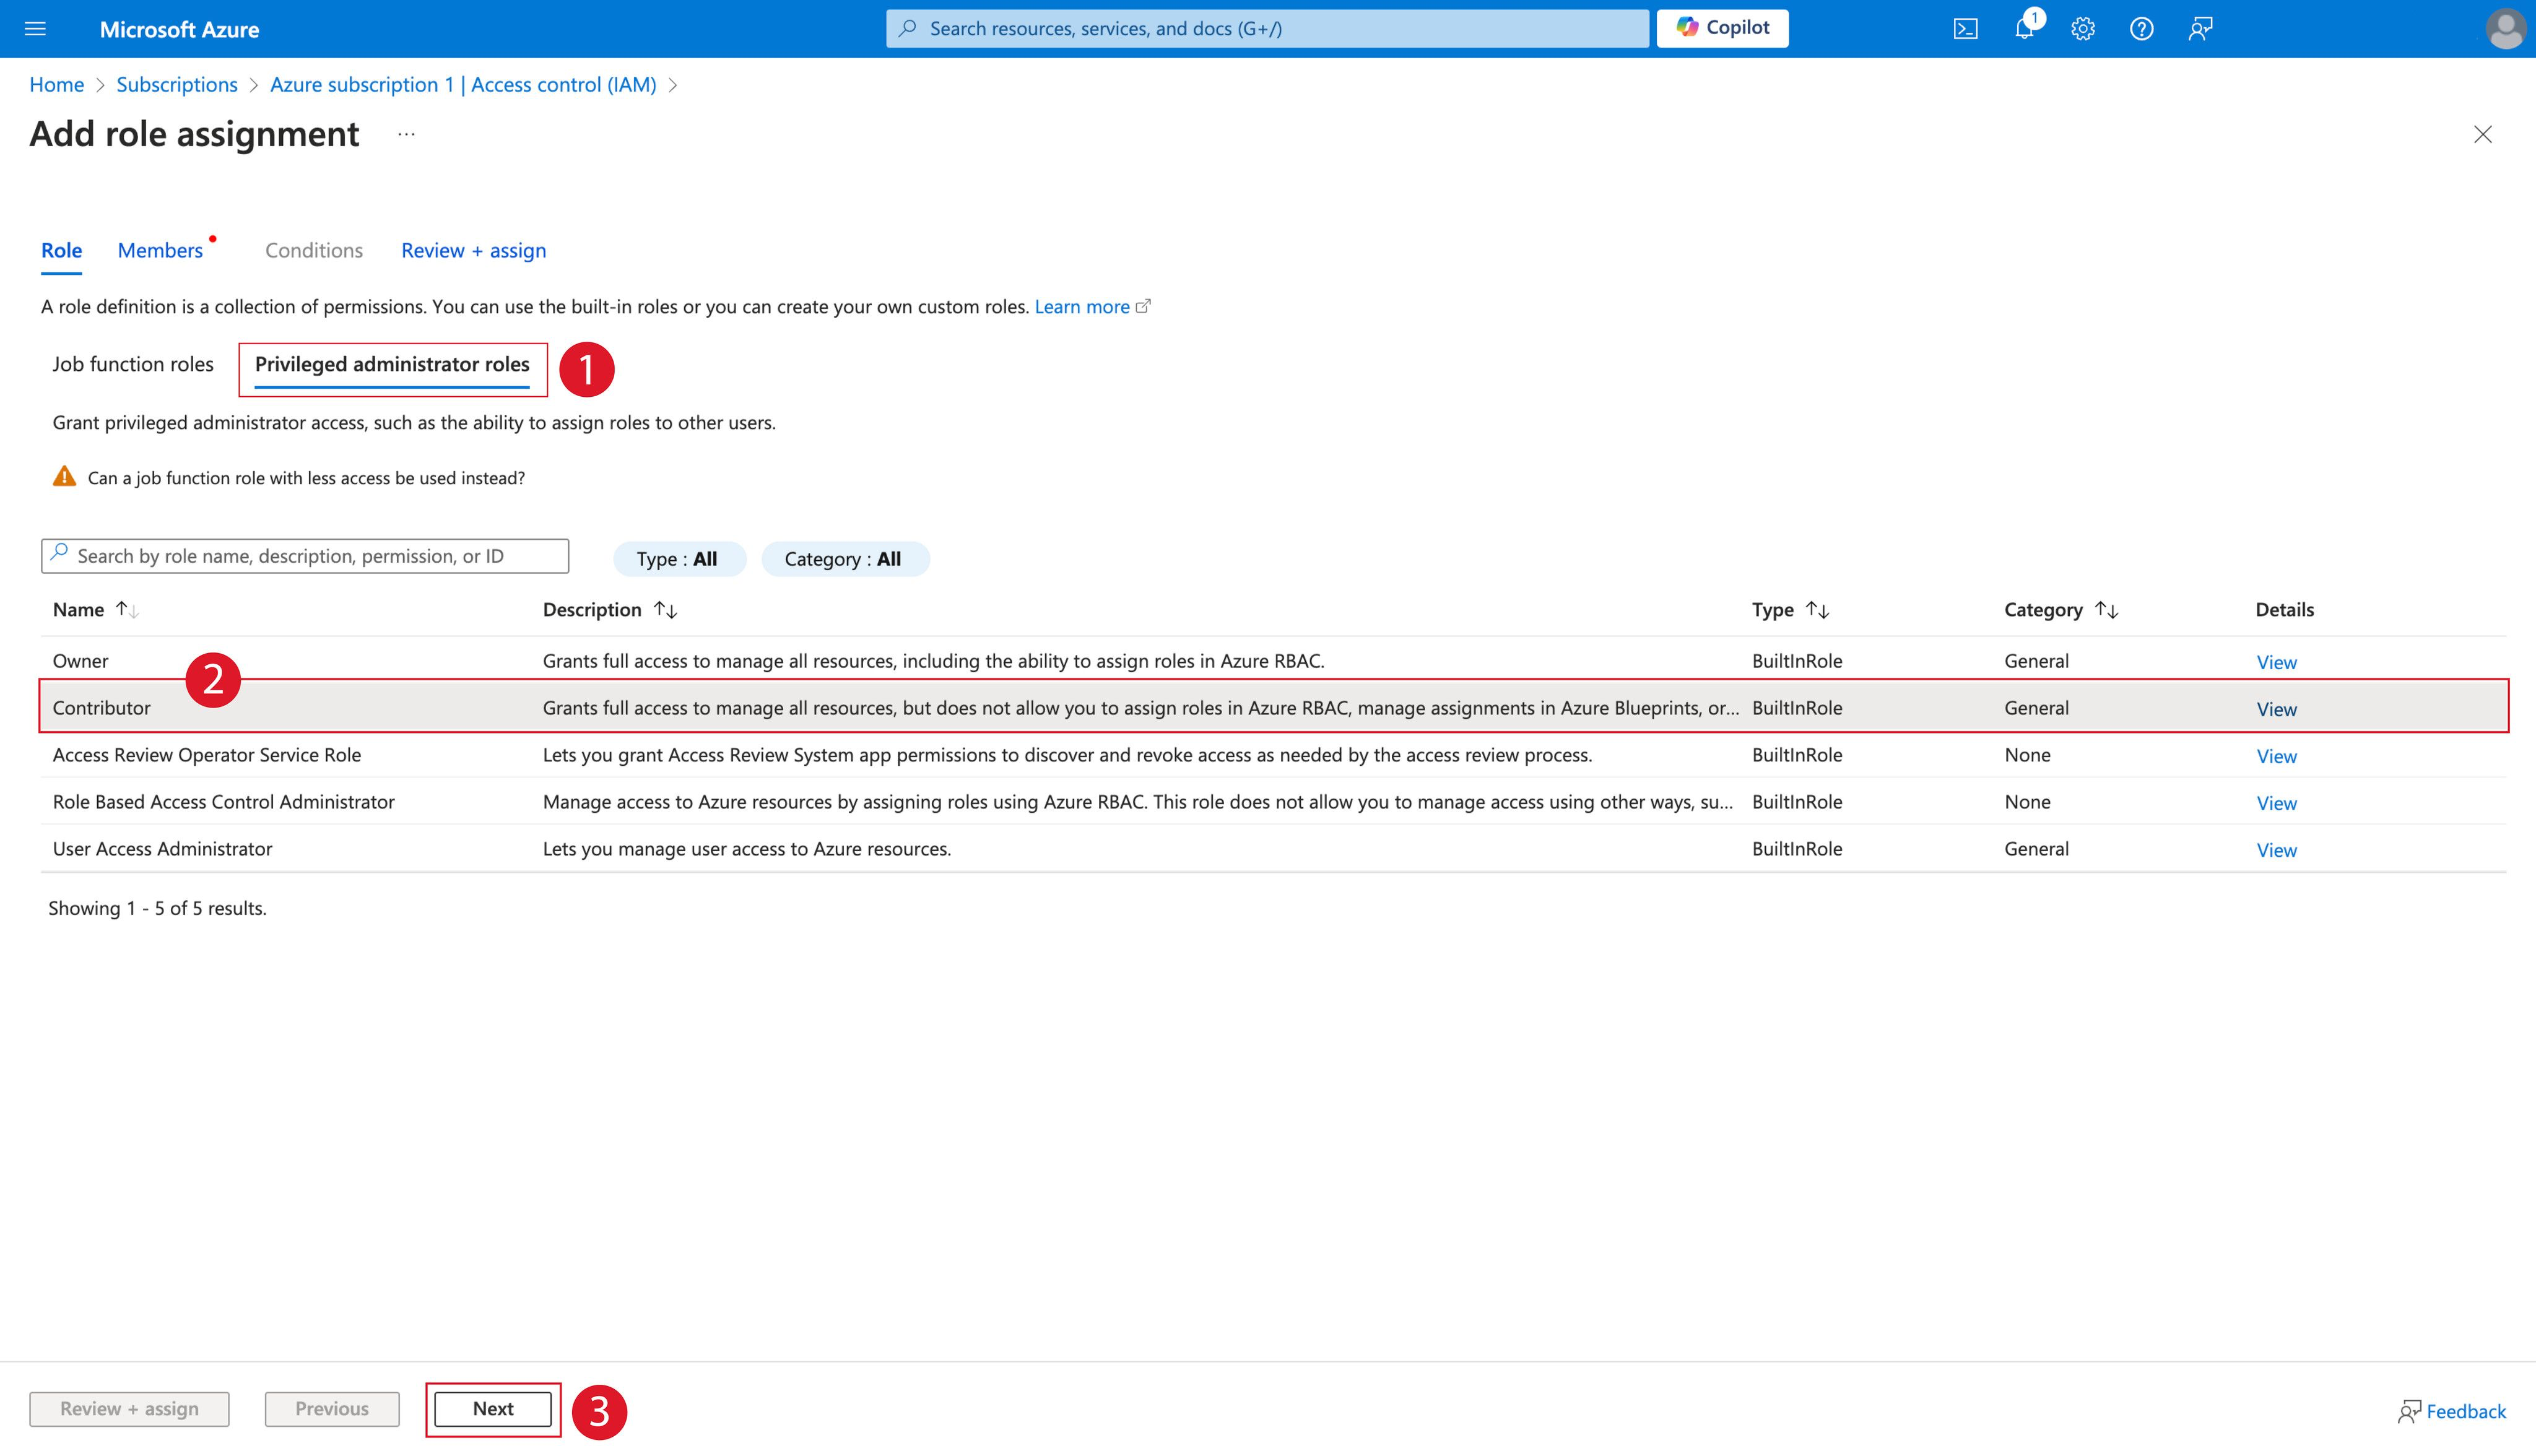
- Click Privileged administrator roles > Contributor > Next.
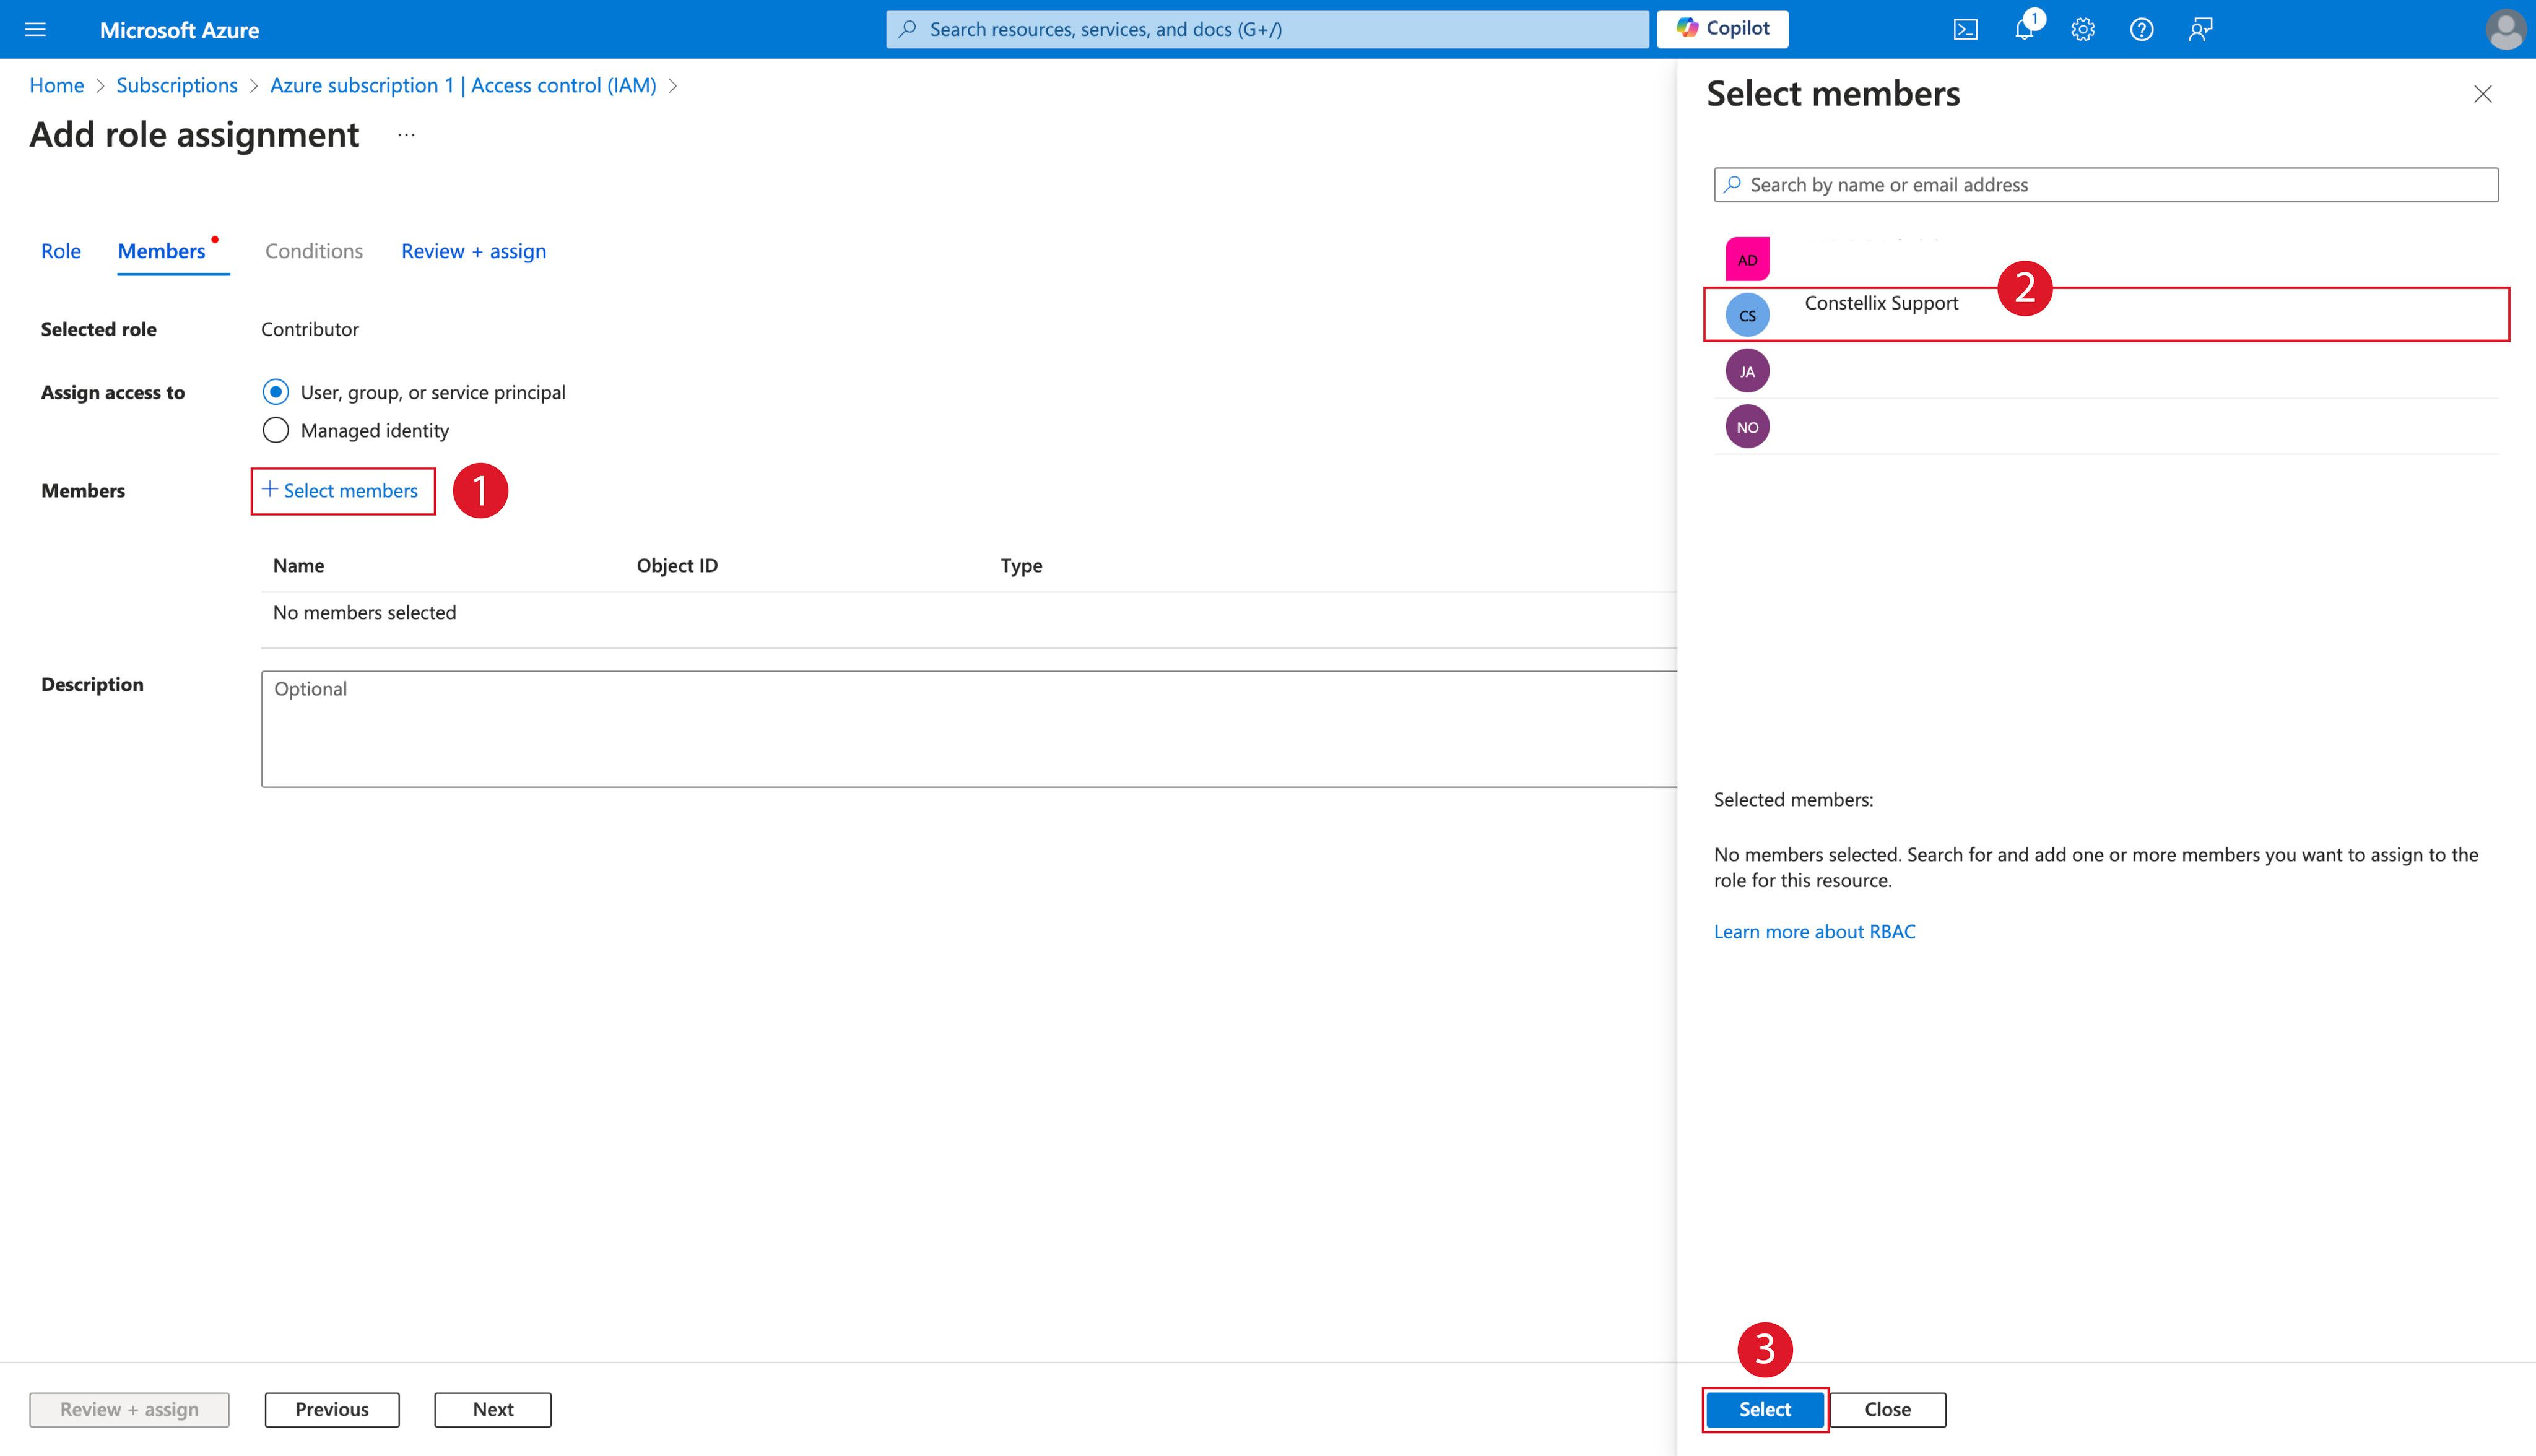
- Click Select members.
- In the window that appears, select each member you wish to assign the Contributor role, and click Select.
- Confirm that the members selected in the previous step appear in the Members group, and click Next.
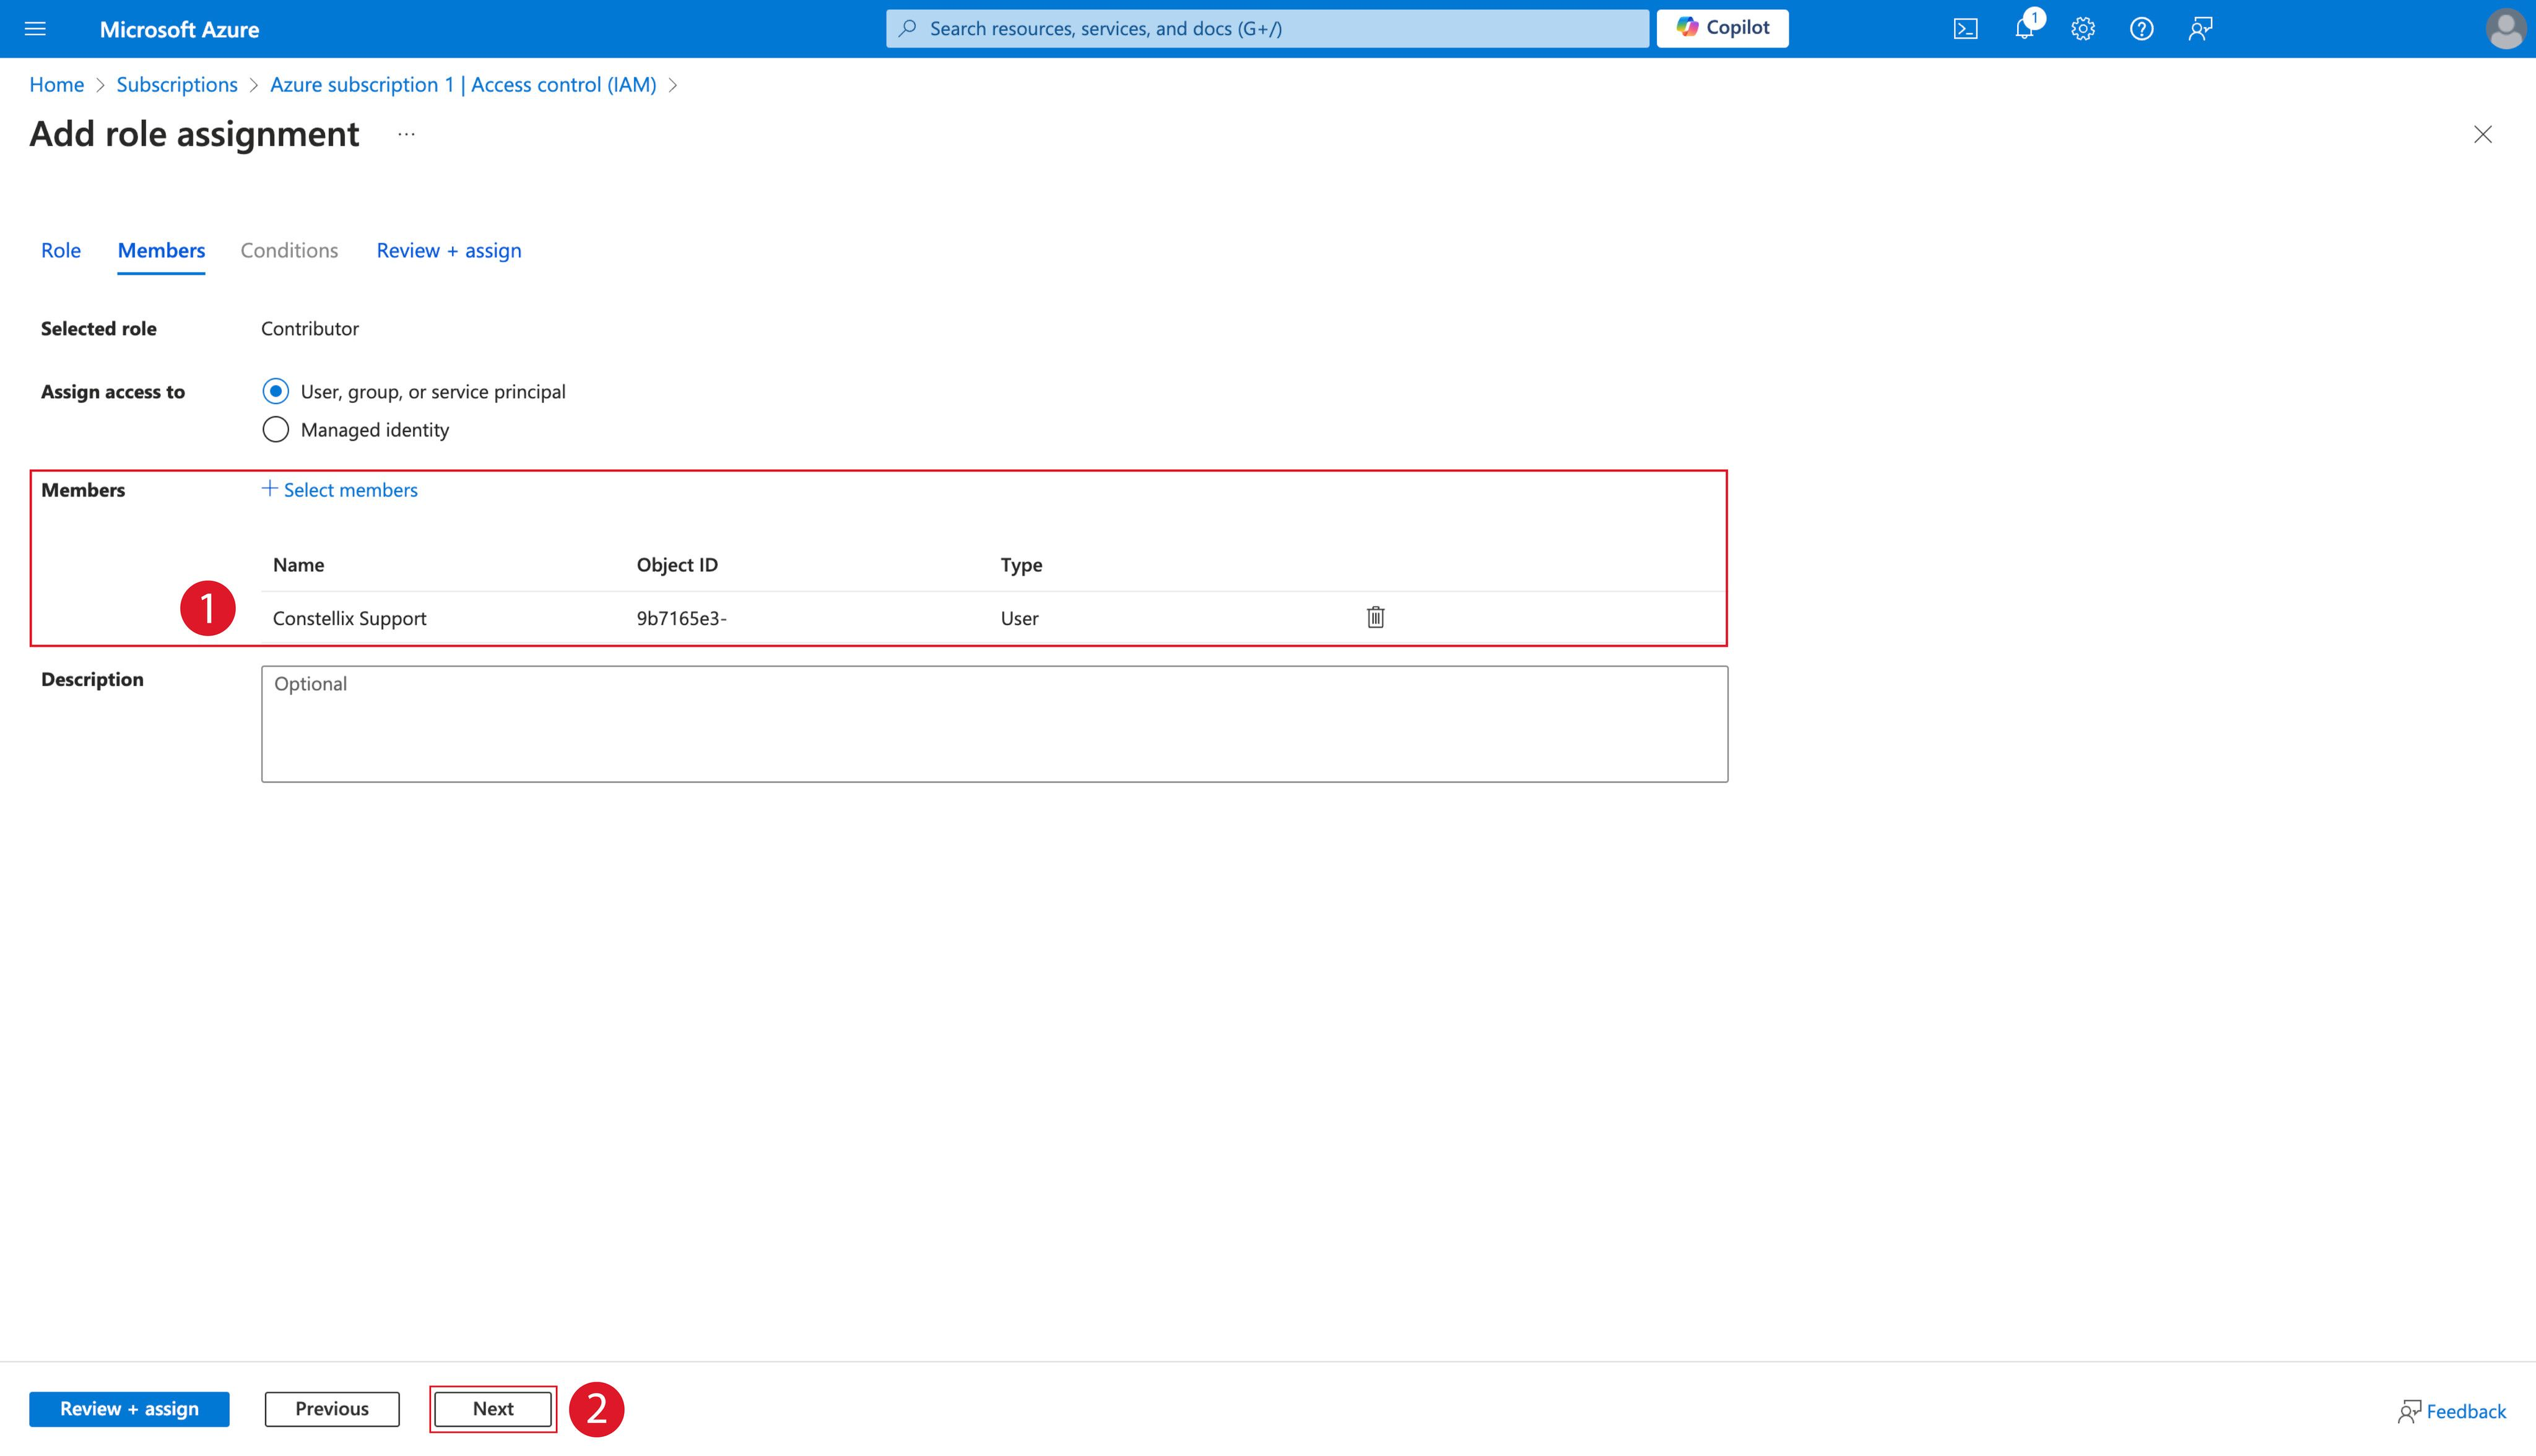
- Click Review + assign.
- Ensure that a success message (confirming that access has been granted to your selected members) appears.

- Navigate to Subscriptions.
- Register your resource provider:
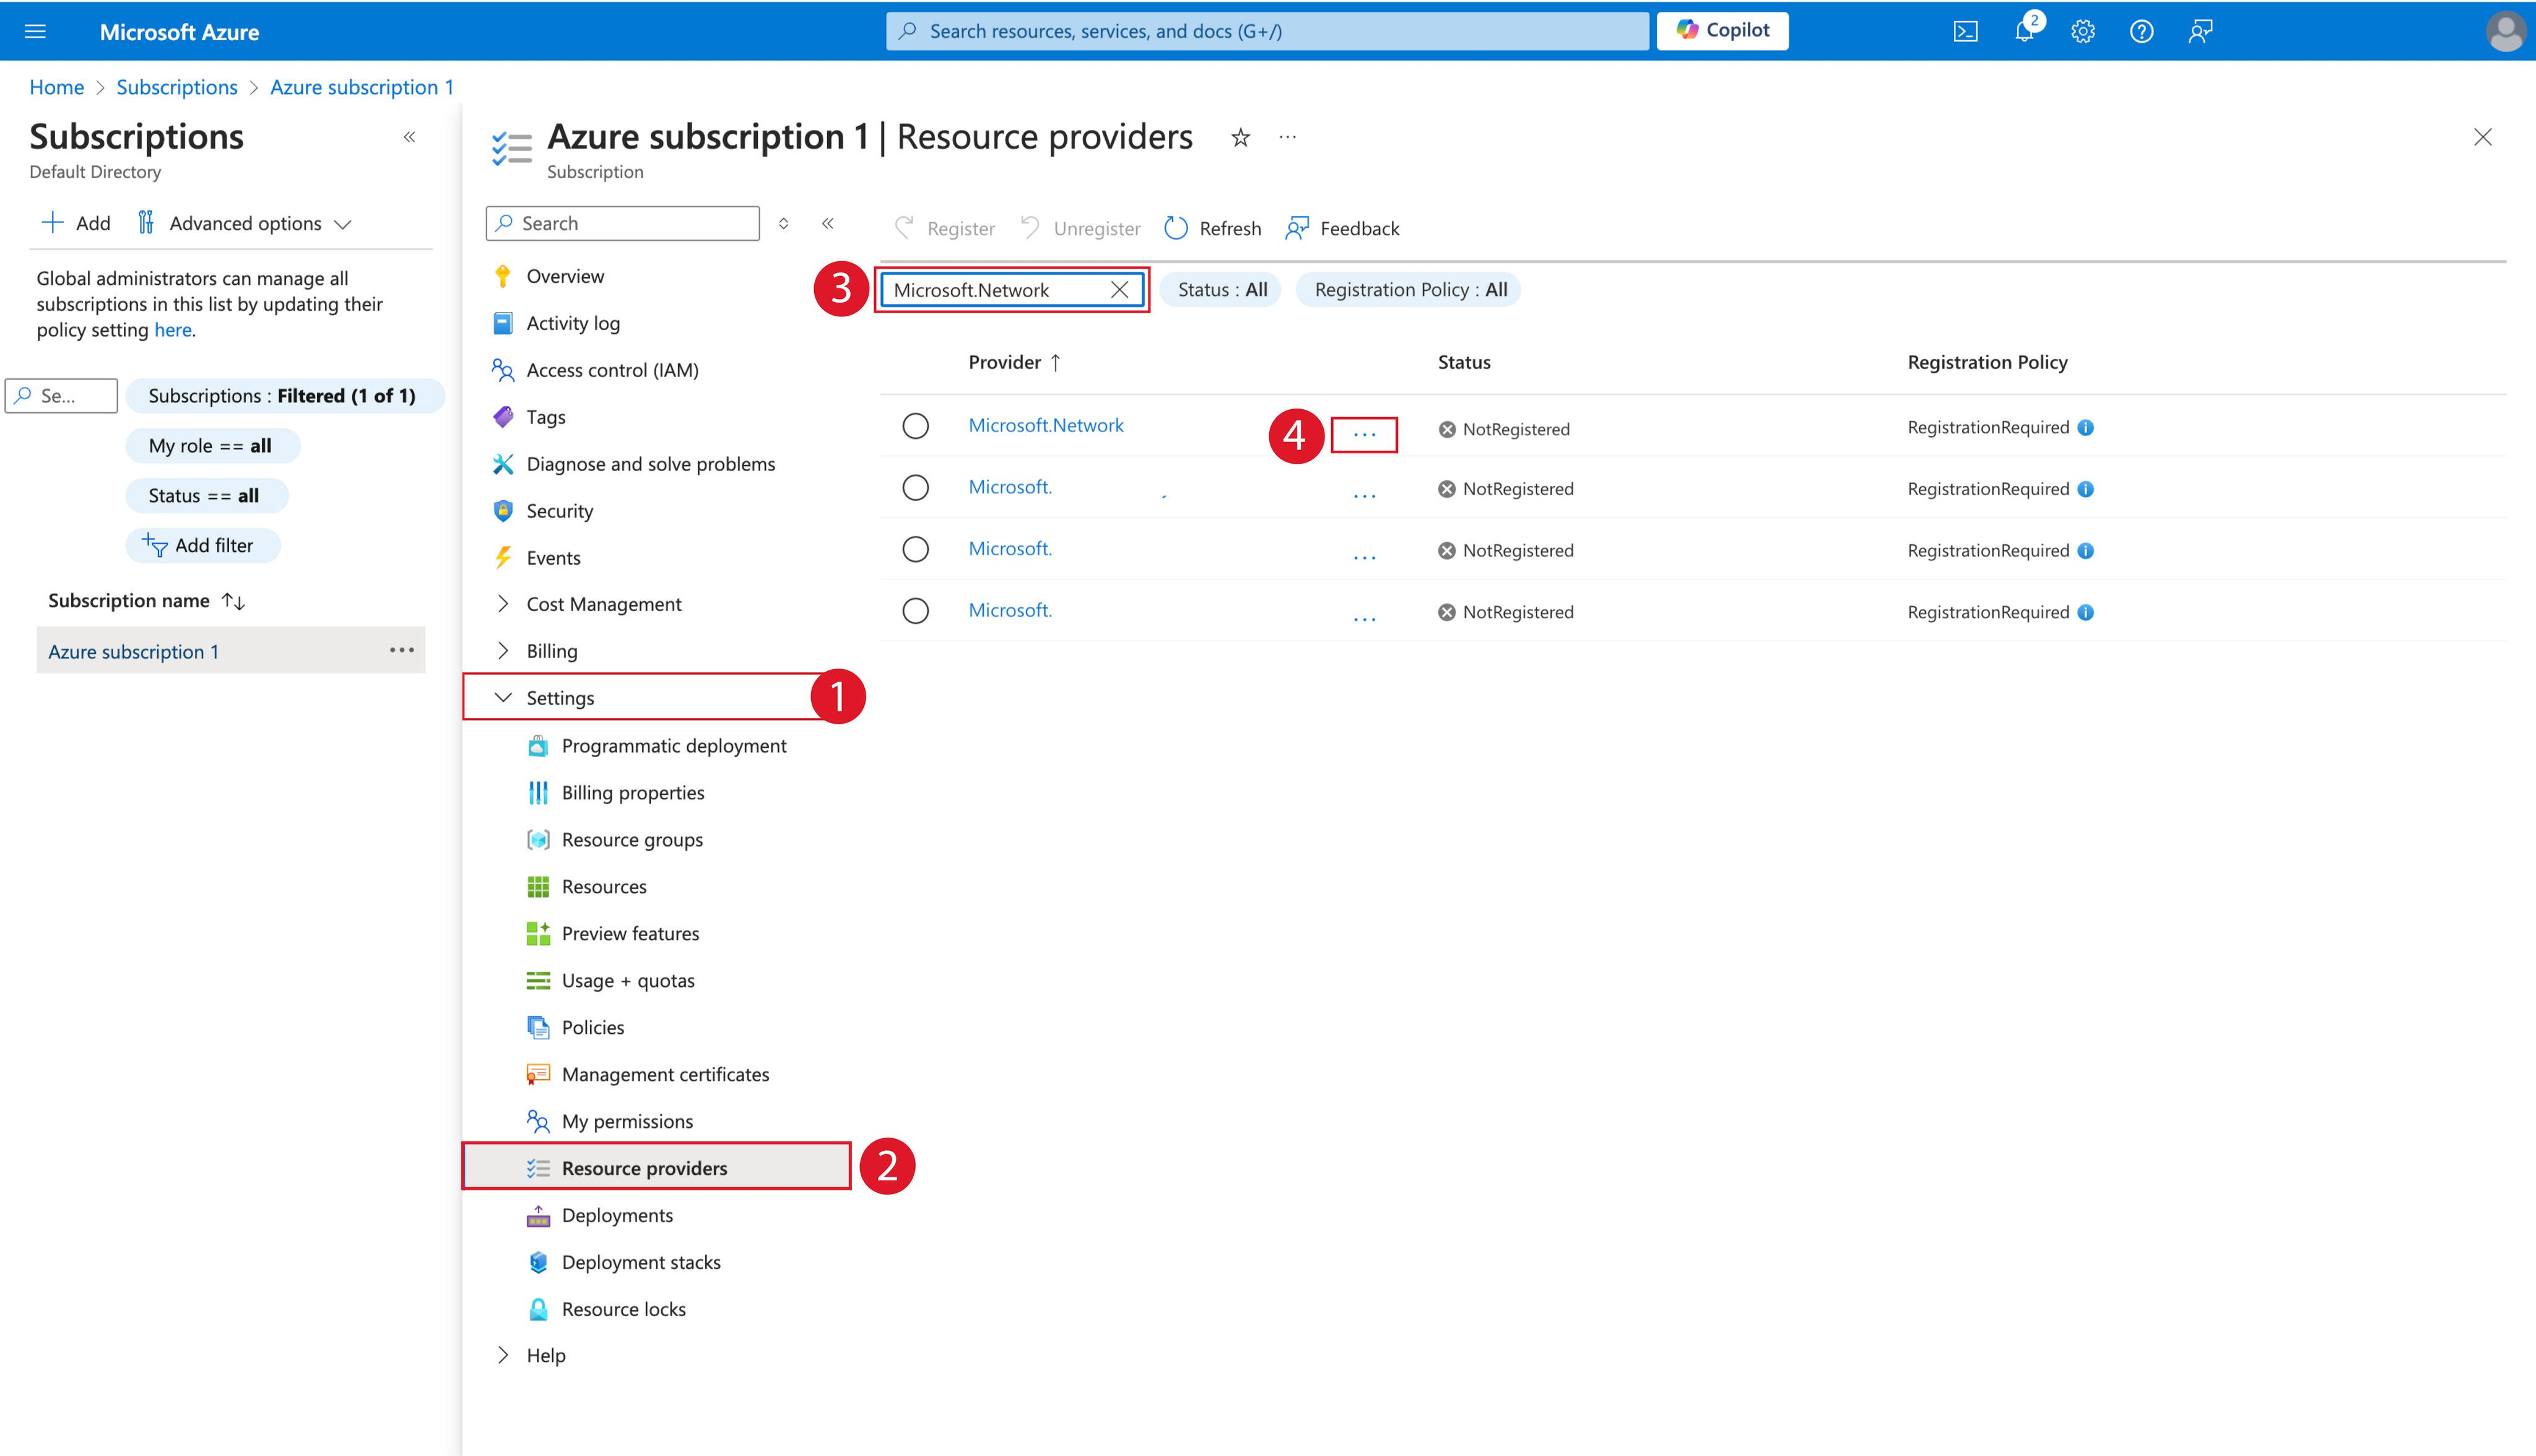
- Click Settings > Resource providers.
- In the search bar, type Microsoft.Network.
- Click the ellipsis icon displayed alongside Microsoft.Network, and select Register from the list that appears.
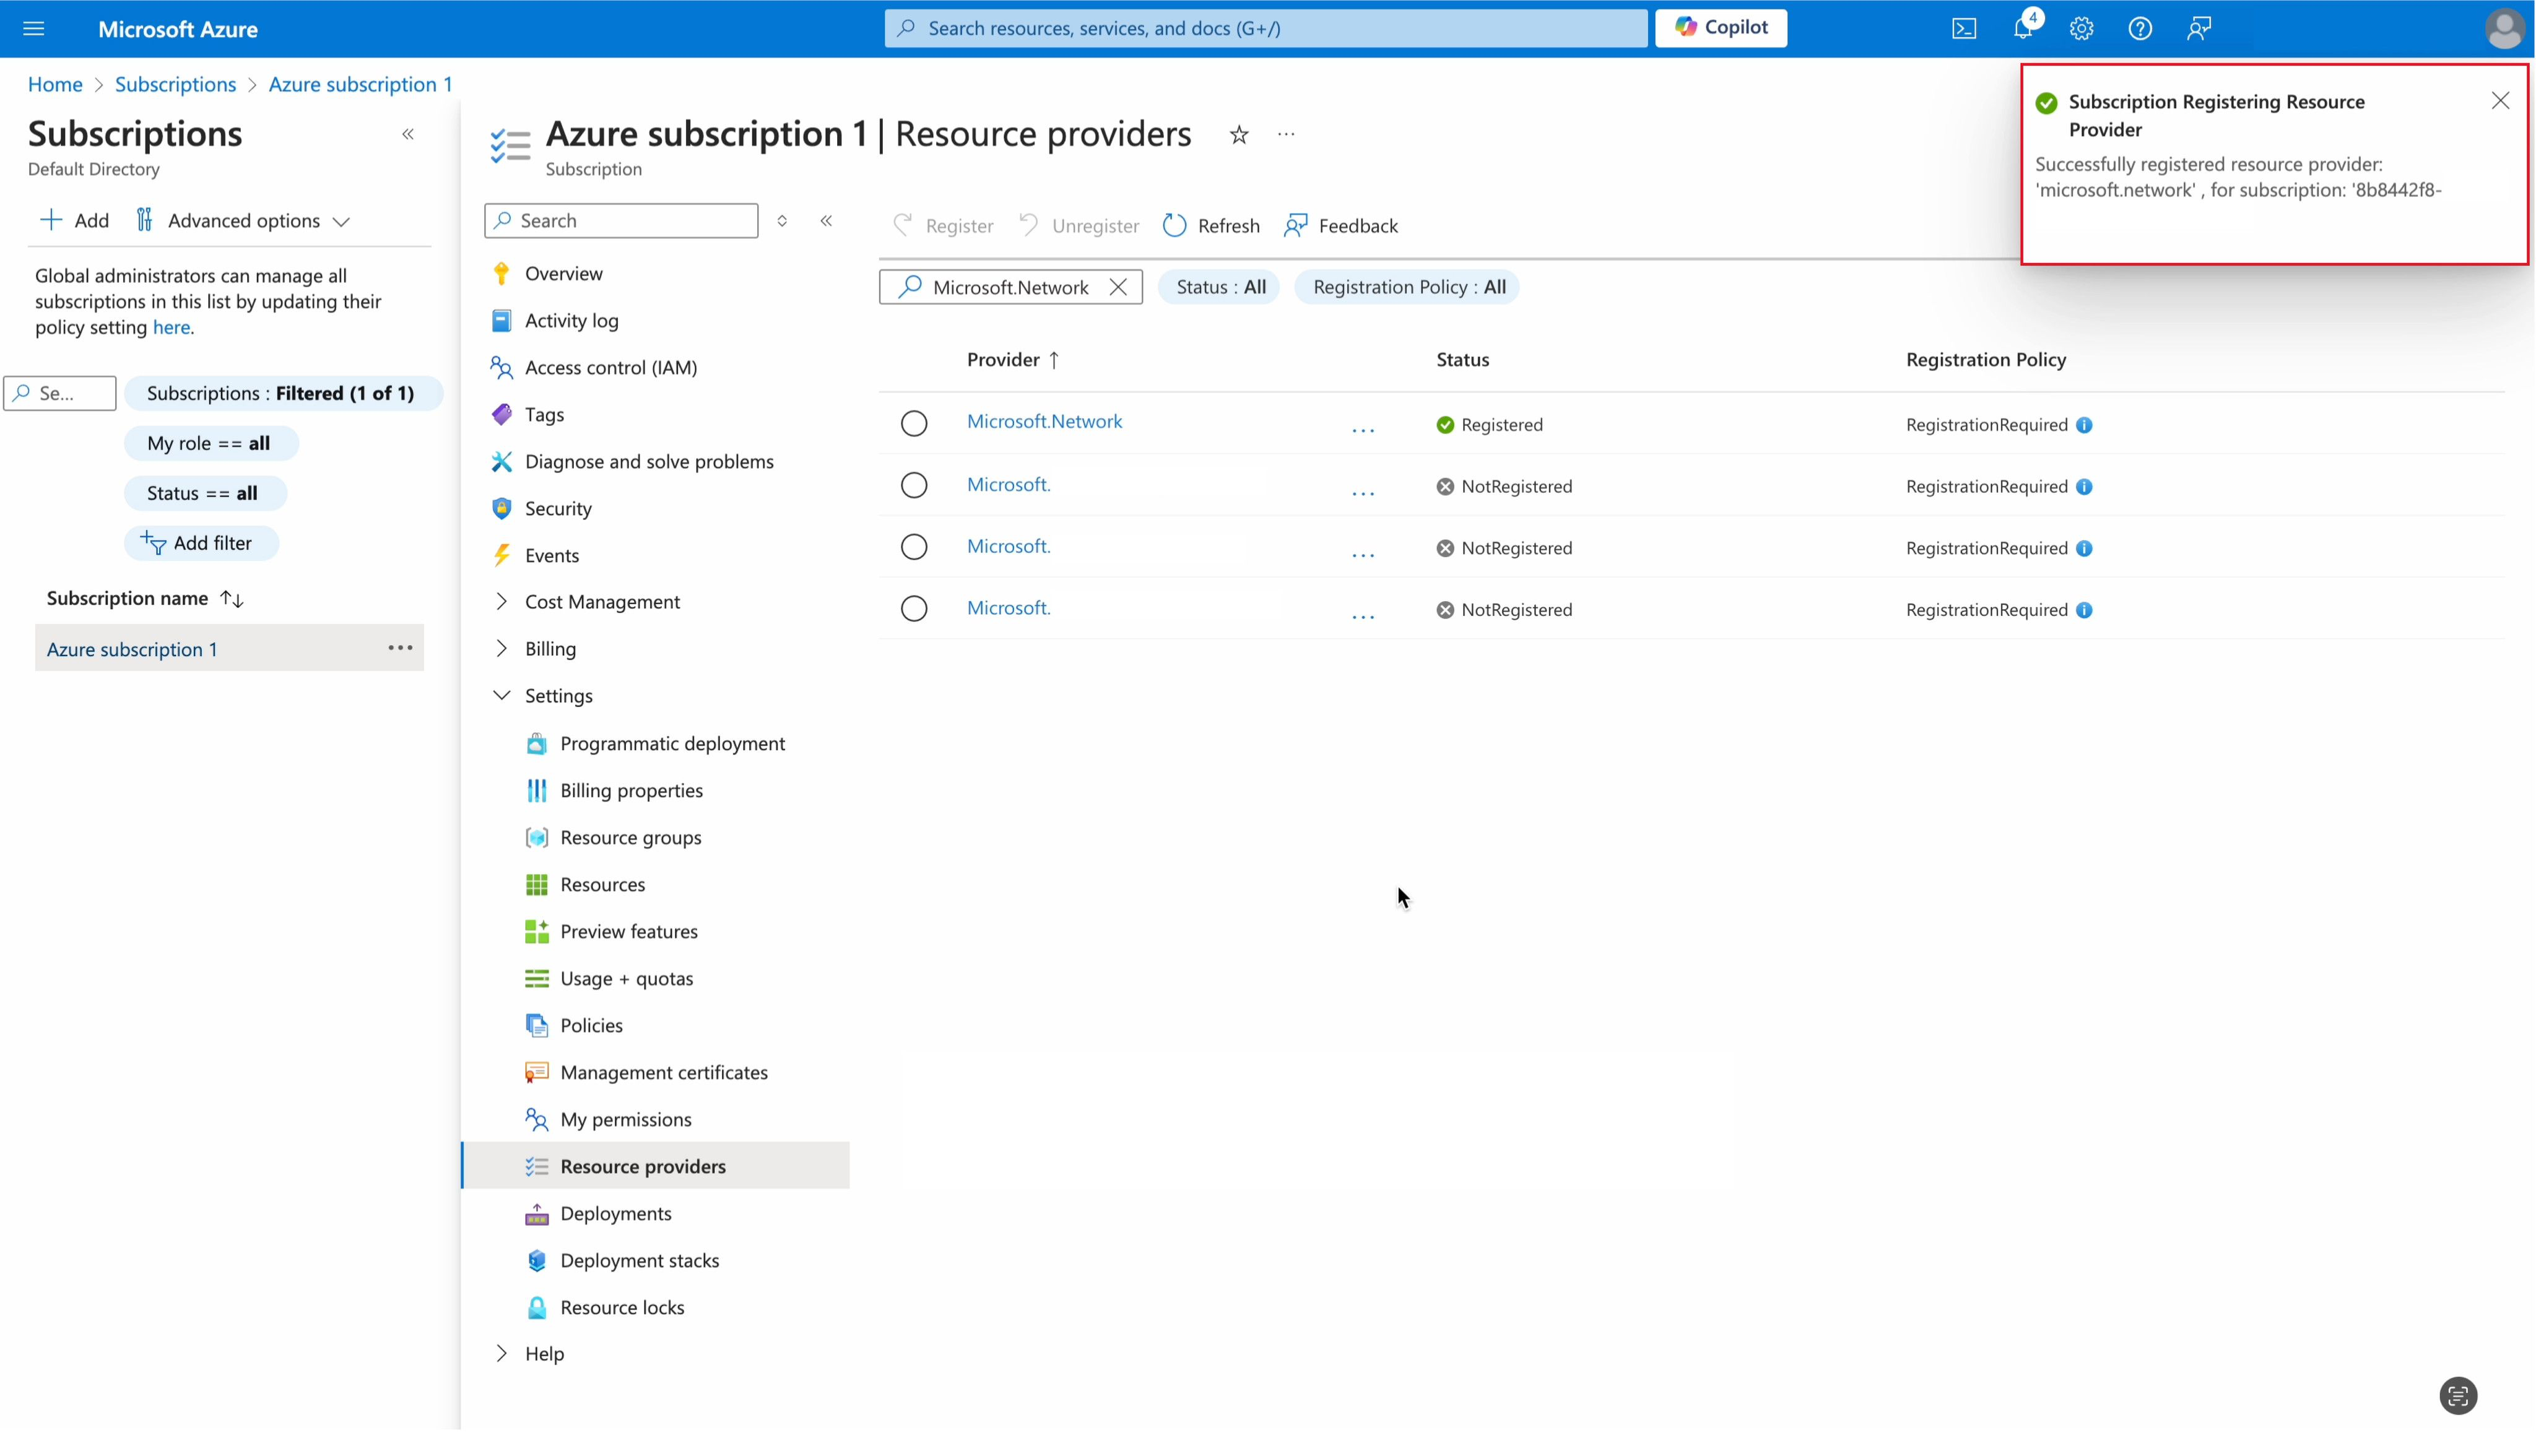
- Ensure that a success message (confirming that the resource provider has been registered) appears.
- Configure your DNS provider:
- Log in to dns.constellix.com.
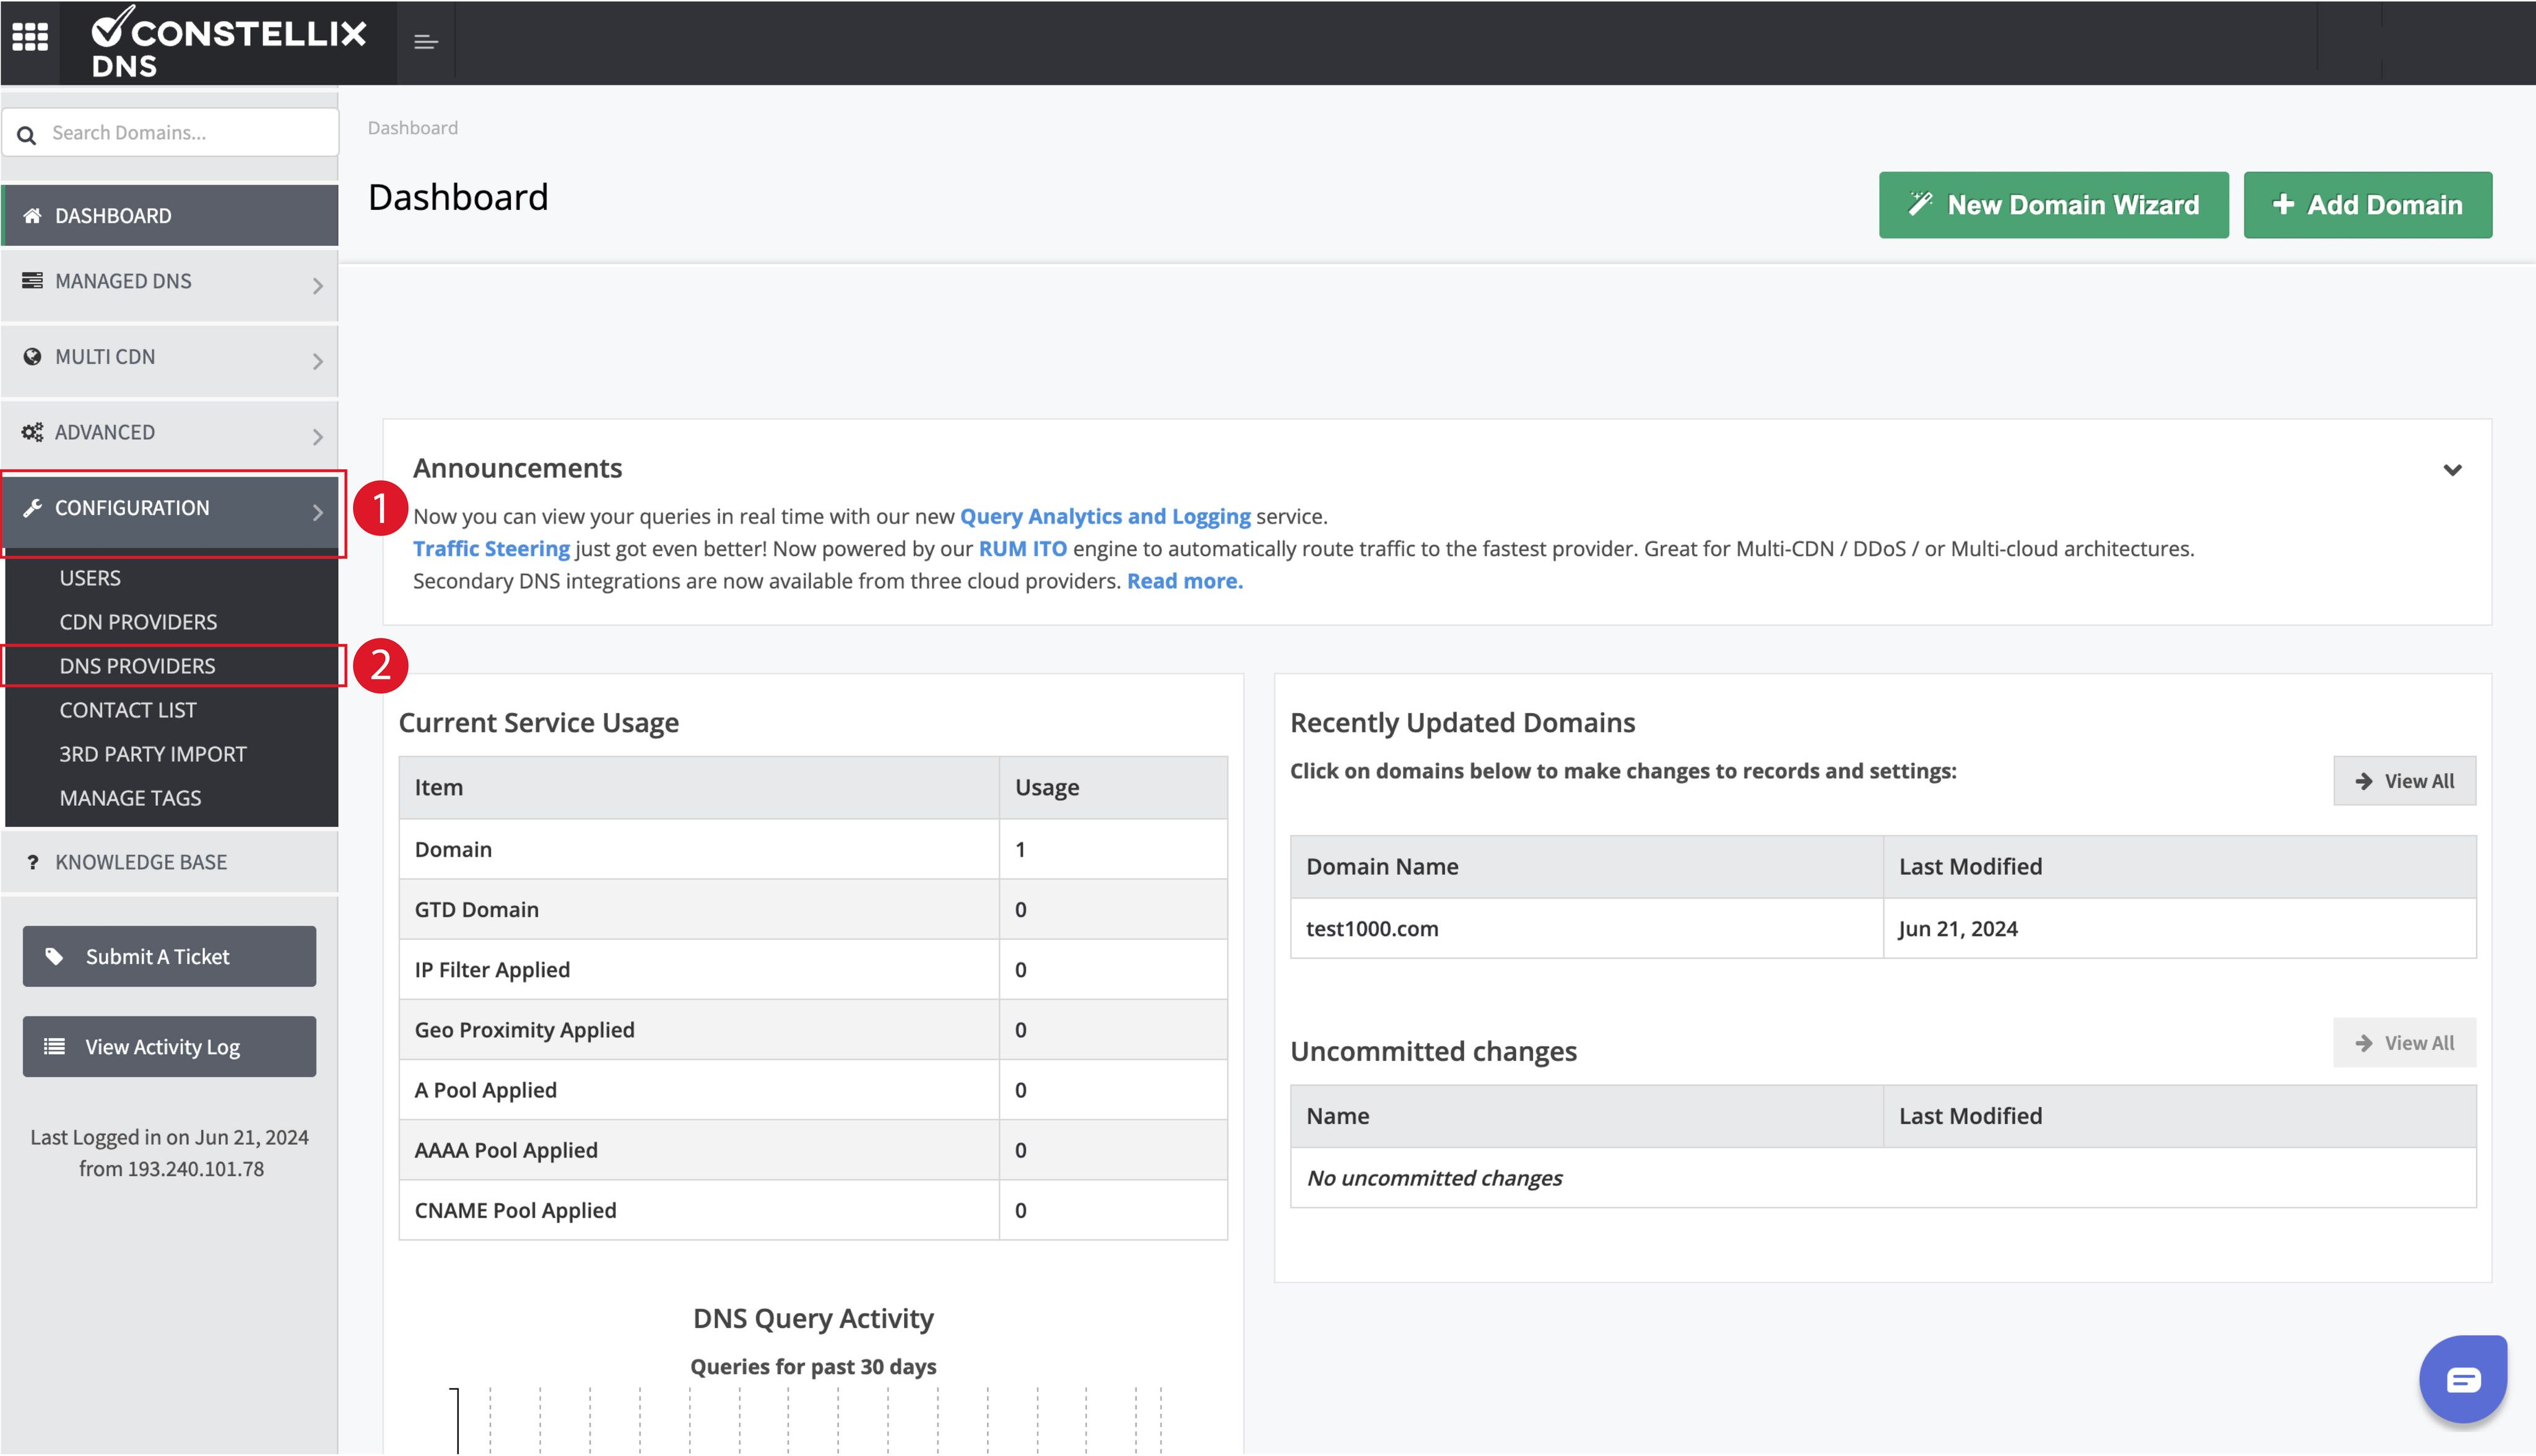
- Click CONFIGURATION > DNS PROVIDERS.
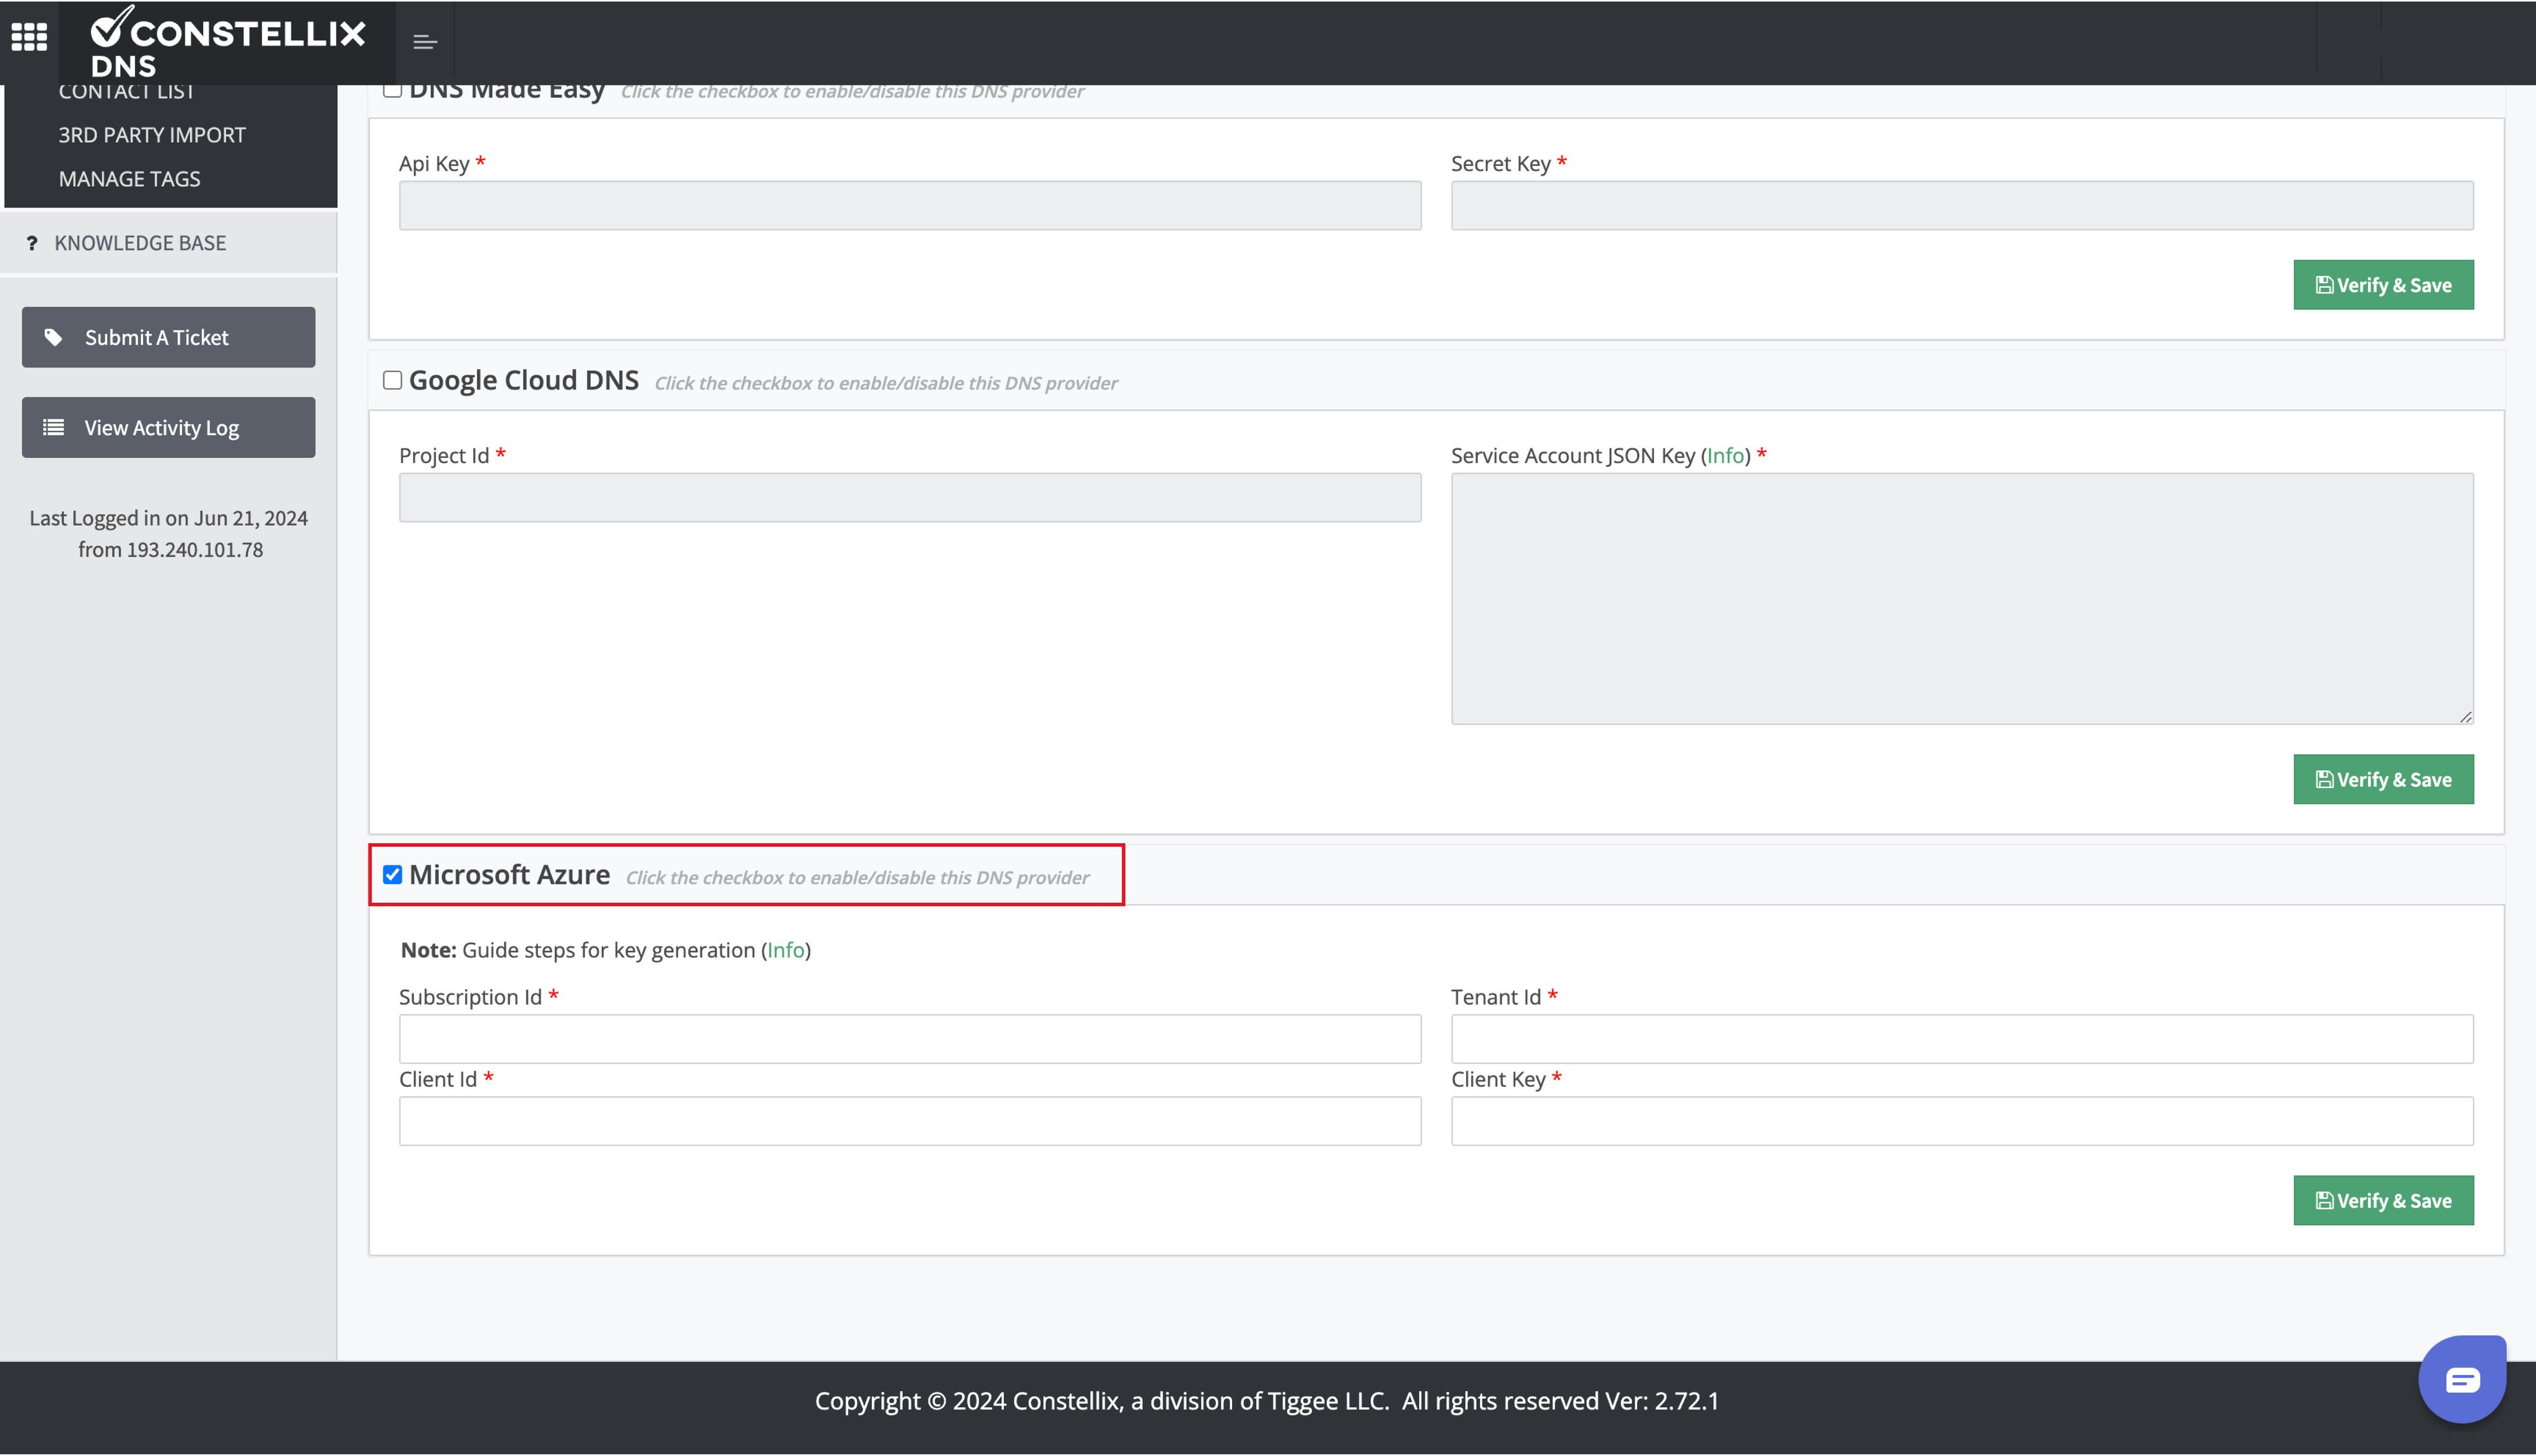
- Scroll to the bottom of the page, and select the Microsoft Azure check box.
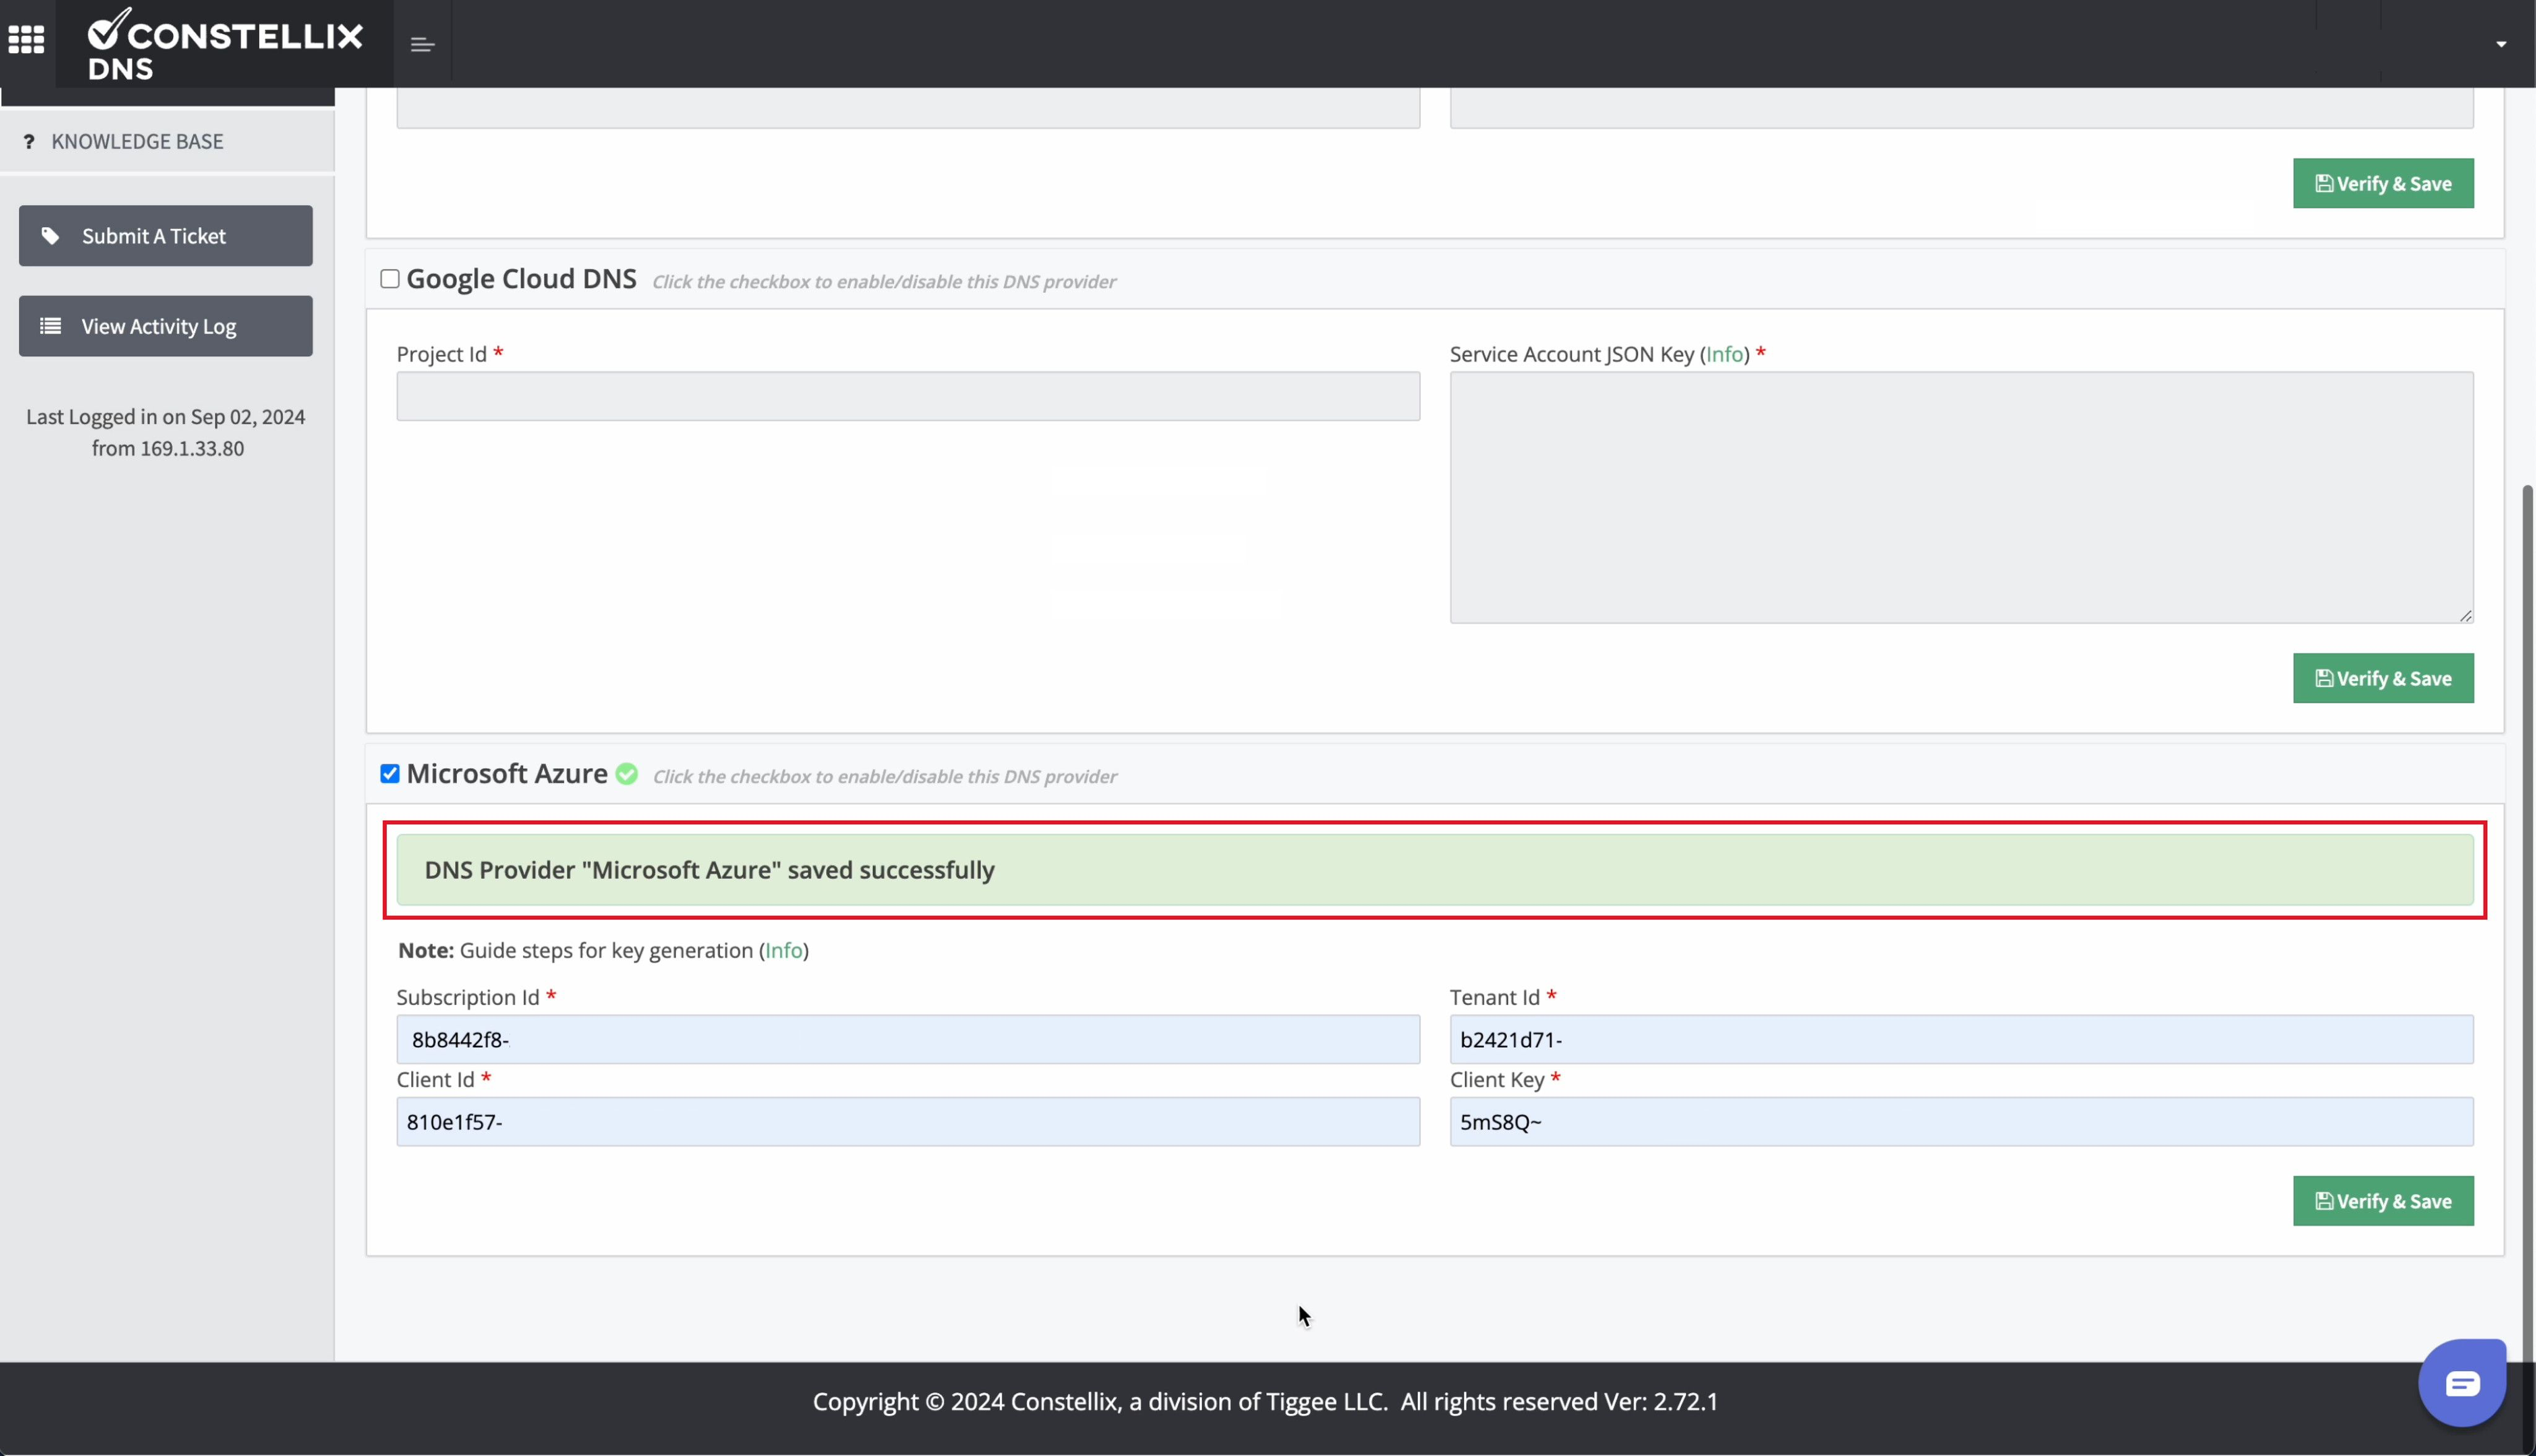
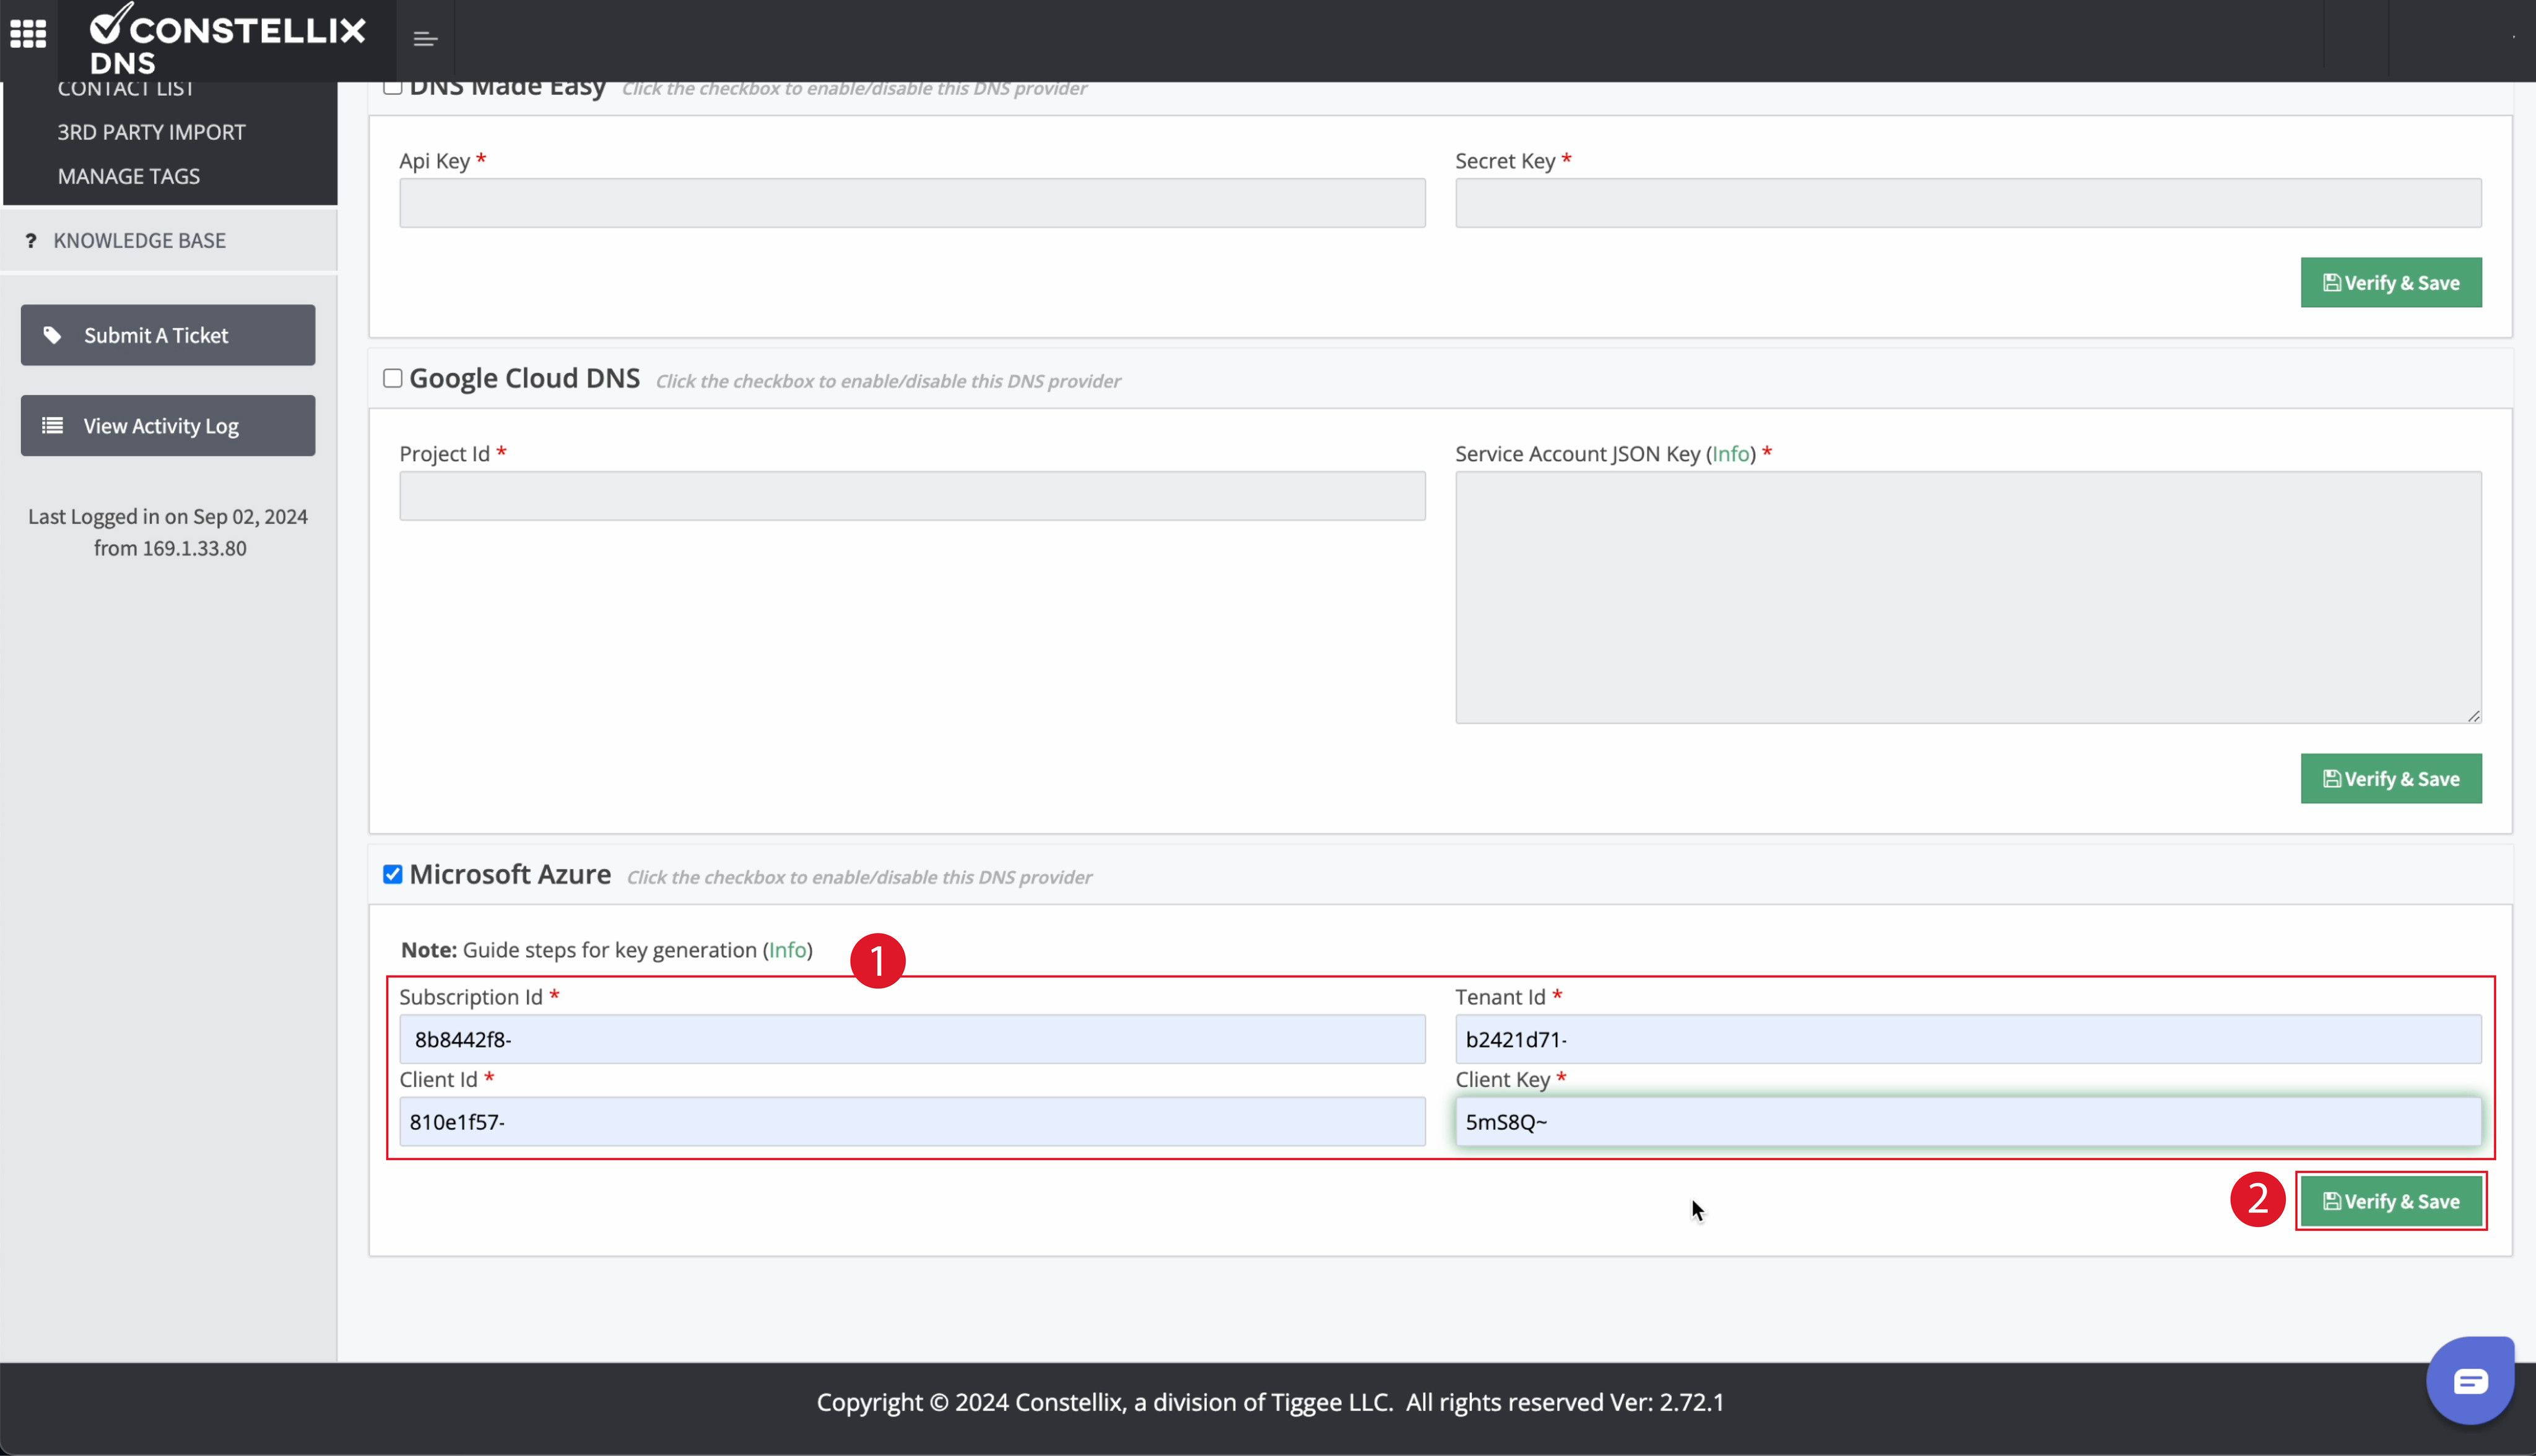
- Populate each field with its unique string obtained in Step 2, and click Verify & Save.
- Ensure that a success message (confirming Microsoft Azure's successful integration) appears.
